
 When you begin considering growing weed, the sheer volume of available information is overwhelming. Learning how to grow weed indoors and understanding the process delivers unique challenges for the first-time hobbyist. As cannabis legalization grows across the US and worldwide, so does the need for good weed growing for beginner’s guides.
Many people make growing weed indoors more difficult than necessary. Growing marijuana only seems difficult because most beginners don’t have the right information.
Our guide, How to Grow Weed, supplies everything you need to grow weed successfully. With your goals in mind, you will learn the right way to grow cannabis.
Find a weed growing style for:
- Your growing space
- Growing tools for your budget
- Getting desired results
Growing marijuana indoors isn’t a difficult endeavor. With extra time each day and a small out of the way space you can grow weed at home.
Full Contents
- 1 What is Marijuana?
- 2 The Effects of Marijuana
- 3 Using Marijuana
- 4 Smoking
- 5 Water Pipes and Bongs
- 6 Inhaling/Vaping
- 7 Ingesting
- 8 Medicinal
- 9 Important Info About Marijuana Growing Methods and Processes
- 10 Growing Marijuana Indoors
- 11 The Best Indoor Space for Weed Crops
- 12 Advantages of Grow Tents
- 13 Mediums for Planting Weed
- 14 The Beginner’s Guide to Growing Weed
- 15 Monitoring Needed for Marijuana Growing Stages
- 16 Growing Weed Seedlings into Mature Plants
- 17 Nutrients Needed for Growing Marijuana
- 18 Monitoring Soil pH Levels
- 19 Methods for Growing Weed Plant Clones
- 20 How to Clone a Marijuana Plant
- 21 Hydroponic Weed Plants
- 22 Steps to Growing Weed Hydroponically
- 23 Temperature – Humidity – Ventilation – Nutrients – Water
- 24 Vegetation and Flowering
- 25 Harvest Time
- 26 The Importance of Light and Growing Marijuana
- 27 Light Sources
- 28 Harvest Time
- 29 Importance of Time of Day
- 30 Preparing Weed for Smoking
- 31 What Curing is and Why It’s Necessary
- 32 Our Final Take on Growing Weed Indoors
What is Marijuana?
 Marijuana comes in two main usage strains known as Cannabis Indica and Cannabis Sativa. Both the cannabis strains are hemp plants, but Cannabis Ruderalis is the industrial hemp used for rope making.
The Ruderalis isn’t good for smoking because of its higher CBD (cannabidiol) ratio that destroys the psychoactive chemical, THC. However, the oil and seeds have health benefits, and growers cultivate Ruderalis with other cannabis strains for breeding hybrid plants.
Cannabis Indica is the choice for medical use, due to its higher CBD to THC ratio. Cannabis Sativa, on the other hand, is mainly used for smoking. When you hear the word stoned or body buzz, it’s the Sativa plant giving the uplifting and creative high.
Sativa strains produce large plants while Indica’s short, dense plant is ideal for the indoor grower. Whichever strain you choose for growing marijuana at home, it’s the flowers and leaves used for smoking. If you don’t smoke, there are other ways for preparing and ingesting weed.
The Effects of Marijuana
 Marijuana effects on a smoker depend on the plant variety and quality which in turn, depends on the plant’s growth quality. Various areas with differing weather conditions and growing techniques influence the potency, taste, and aroma. However, it’s the cannabinoids that cause the weed’s different effects.
A cannabinoid is a chemical family produced by different cannabis plant strains in different concentrations and combinations. These combinations get you high when smoking weed. The potency and the level of high depend on the cannabis growing conditions, plant variety, and preparation techniques.
Tetrahydrocannabinol or THC is the active key ingredient in marijuana. All parts of the male and female plants contain this active ingredient. THC is highly concentrated in the female’s flowers resinous tips. This resin concentration, known as hashish, has a strength eight times that of regular marijuana.
Marijuana affects each person differently depending on what they smoke. However, most people have positive effects when smoking pot, including:
- Heightened senses
- Mood alterations
- Stress relief
- Relaxation
- Heightened levels of pleasure
- Nausea relief
- Pain relief
- Positive and improved thought processes
While using marijuana delivers some positive effects, like anything else, using in excess has bad effects.
The negative side effects of improper use include:
- Dizziness and headaches
- Sleeplessness
- Anxiety, tension, and stress
- Short-term memory loss
- Negative psychological impacts
- Respiratory problems
Using Marijuana
Now that you know a few beginning basics of growing weed, it’s time to learn the ways of using it. Some of the more popular use methods include:
- Smoking
- Water pipes and bongs
- Inhaling/Vaping
- Ingesting
- Medicinal
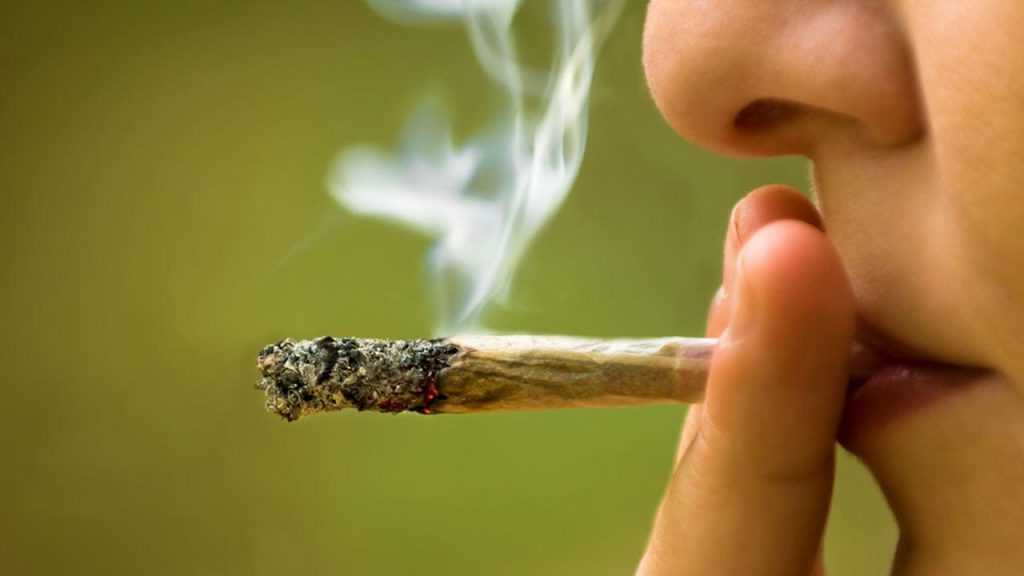 Smoking
Burning weed releases THC for absorption in the lungs when smoking and is the most popular way of using marijuana. However, experts recommend taking light puffs to lessen lung stress. Also, too much smoking can lead to asthma and is considered the unhealthiest method.
Smoking comes in the form of a marijuana joint. While joints are fat or thin, the key to a smoother smoke is a tight roll.
Spliffs, another direct smoking method, is a joint consisting of pot and tobacco mixtures. Because of the weed and tobacco mix, you get a muted high, but it’s mixed with a nicotine buzz.
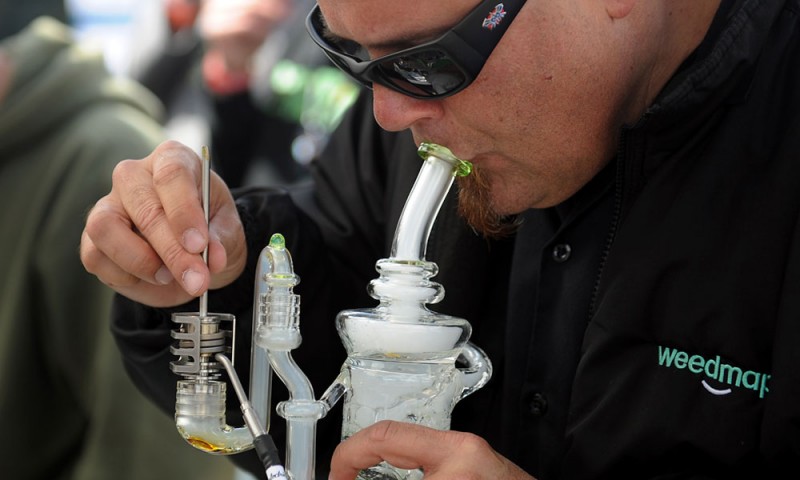 Water Pipes and Bongs
Special water pipes and bongs cool down the marijuana smoke and clean the smoke before you inhale it. The bong cools the smoke as it passes through the water. You still get the savory bud taste, but without the lung irritation, you get from direct smoking the burning weed.
THC isn’t water soluble, so you get the same level of high as you get from smoking. When using pipes, we recommend aluminum, stainless steel, or glass. Avoid plastic or wooden pipes and bongs with their possible carcinogen contamination.
 Inhaling/Vaping
The inhaling process, also known as vaping, heats the cannabis while the user inhales the weed vapor. Inhaling delivers a cheaper, more effective high. With the ability to make an inhaler or vaporizer you save money. Also, vaping makes a mellower pot smoking method and an ideal high for non-smokers.
Ingesting
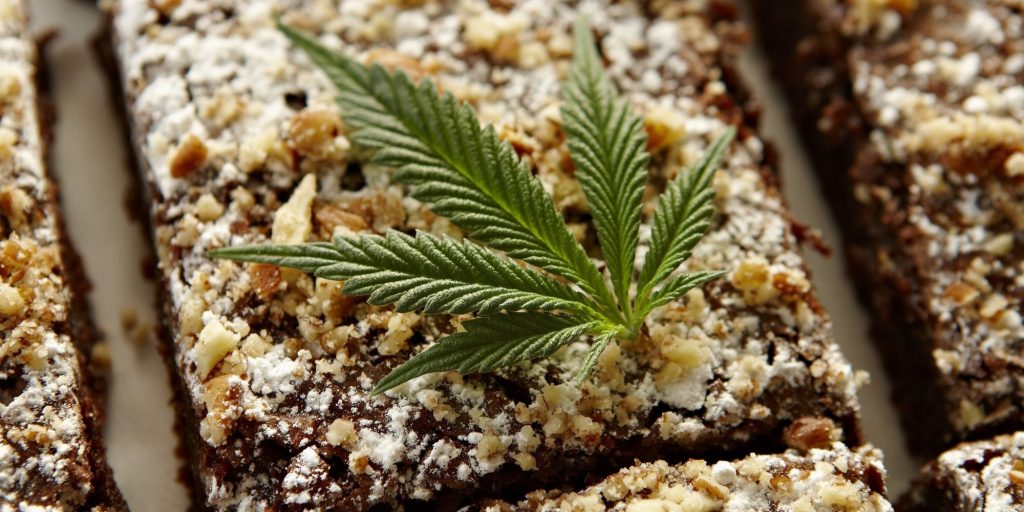
The jury is still out on the ingestion of cannabis for a high. Some say eating raw cannabis delivers the sought-after euphoria while others believe that it’s scientifically impossible. But using weed as an ingredient in baking or as a tea has a proven track record. However, when eating your favorite weed brownie, be cautious.
The chance of overdosing with edibles is easy. So, before you think the first brownie or cup of tea was a dud, give it time. Ingestion delays the effect as much as three or four hours.
Eating or drinking pot goodies is an economical high. But, depending on the food it’s added too, eating or drinking your high can add a level of unhealthiness.
Medicinal
 While marijuana has a reputation for getting you high, there is a host of medicinal uses for weed.
The versatile medical uses include:
- Cannabis oil
- Tinctures
- Massage Oils
- Topical lotions and creams
- Some uses in modern medicine
- Beauty and health creams and oils
- Intimate lubrication products
Growing marijuana plants isn’t just for getting people high. This multifunctional plant, when combined with other chemicals and natural herbs, has many beneficial uses.
There’s an ongoing debate about the best ways for using and consuming marijuana for medical purposes. However, the best and most important method depends on the person and the outcome they expect.
A good example of medical use is for pain relief. Those looking at marijuana for pain only need a discreet, clean and efficient method without a constant high.
On the other hand, those looking for a recreational high prefer smoking or using a bong. In this case, discretion and muted highs aren’t an issue.
Armed with a basic understanding marijuana and its uses, it’s time for the step by step how to grow marijuana.
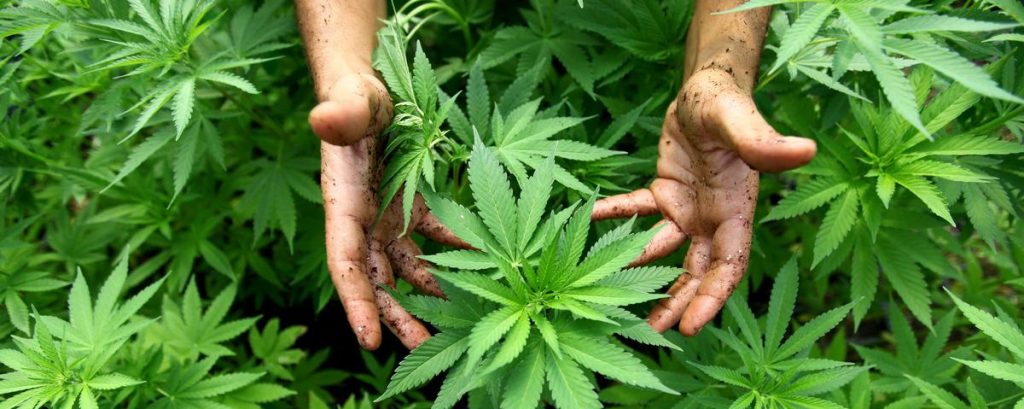
Important Info About Marijuana Growing Methods and Processes
 Now we begin the discussion of homegrown marijuana and its growing and processing methods. Our guide to growing weed helps the beginner learn to grow cannabis at home. Understanding basic marijuana growing methods help deliver successful first time growing weed results.
Below we explain growing pot plants and the pros and cons. We also cover the different effects and influences affecting the crop’s outcome.
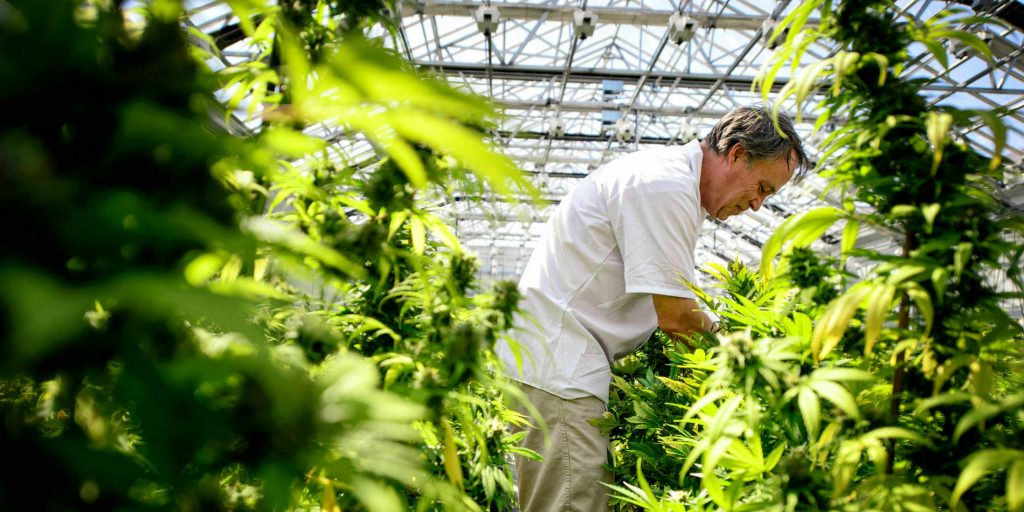
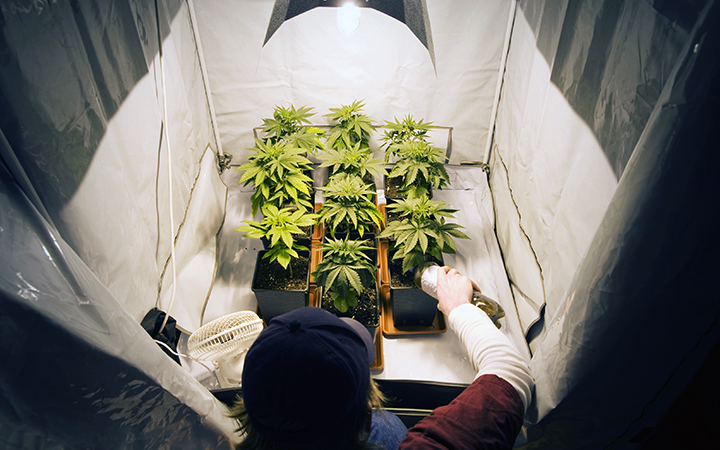
Growing Marijuana Indoors
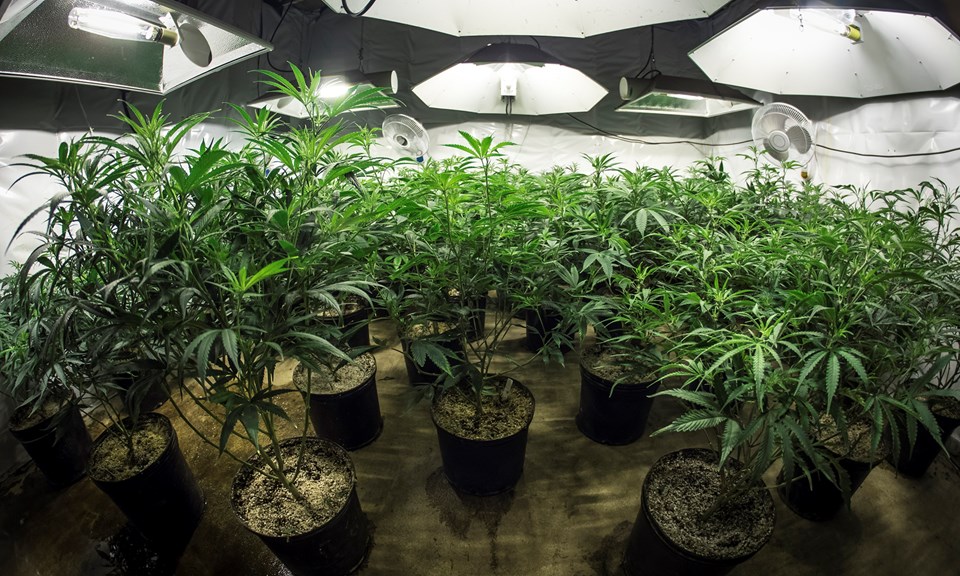 For the recreational user, indoor cannabis growing is the most common due to the ease of cultivation. However, a downside to this growing method is the lack of open-air nourishment in which most plants thrive.
Even with the lack of natural growing nutrients, with good growing techniques, cultivating quality marijuana is easier indoors. The easiness of indoor growing comes from closely managing and controlling growing conditions.
There are several advantages and disadvantages to both styles of growing marijuana. Continue reading to decide whether indoor cannabis cultivation is best for you.
Indoor Cannabis Growing Advantages
- Cultivation controlled by the grower.
- Protection during growing cycles.
- Good quality weed production.
- Good control and optimization of growing conditions including nutrients, humidity, temperature soil, and water levels.
- Ability to flower the marijuana crop.
- Complete control over light exposure.
- Eliminates light overexposure which affects enzyme activity and chemical reactions.
- Lessens exposure to insect and disease damages.
- Better quality weed when grown indoors.
Indoor Cannabis Growing Disadvantages
- Experts and evidence point toward sunlight providing healthier nutrients and better photosynthesis than artificial light.
- Indoor growing doesn’t always provide proper ventilation.
- Regulating lighting, temperature, and humidity is difficult even when growing weed indoors.
- With less growing space, you get a limited marijuana crop size.
- Less crop height.
- Risk of harming plants from growing too close to grow lights.
The Best Indoor Space for Weed Crops
 Indoor growing gives you the most control over your growing environment. The indoor pot crop produces consistently dark buds. However, with indoor marijuana growing, you are responsible for providing everything your plants need. If you don’t provide for your plant’s needs, you can lose most of your crop.
The first, and most important consideration when planning to grow marijuana indoors, is what space will work best. Almost anywhere your plants have easy access to fresh air and water; you can grow cannabis.
Some ideas for growing space include:
- Spare Bedroom
- Closets
- Spare Bathroom
- Garage Space
- Grow Boxes
- Grow Tents
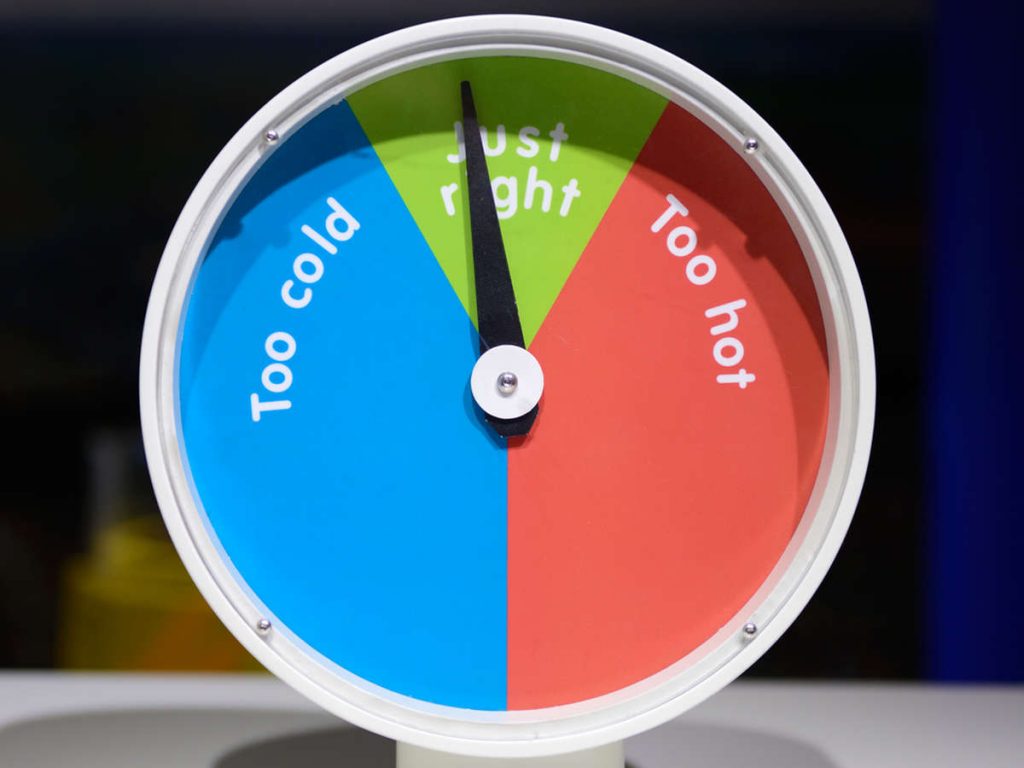
In addition to where to grow indoors, you should also consider the best area for controlling the temperature of your grow space. When you have your grow lights operating, the temperature of the growing area rises.
Young cannabis plants grow best in warmer climates at 70° to 85° Fahrenheit. However, older plants in the flowering and budding stage, prefer things a bit cooler. The optimal temperature for producing the best color, smell, and trichome (THC) production is around 65° to 80 Fahrenheit.
Because of the importance of growing temperature, consider the amount of control you have over the growing area temperature. If you grow your crop in a grow box or grow tent, a fan can pull hot air away from the grow lights.
Advantages of Grow Tents
When it comes to growing cannabis for beginners, grow tents offer the best growing space for your new weed crop. You only need to decide what tent size you should get to fit your planned growing space.
Grow tents are a cheap and effective way for improving plant growth environment, saving a lot of marijuana crop trouble. Most grow tents have a design that accommodates soil pot and hydroponic growing methods.
You get a variety of features with the different grow tents available. All basic tents have a six-sided, lightweight exterior covering a sturdy frame. The tents have a main opening and several accessory access features for electric, lighting, and ventilation.
Things to look for in a quality grow tent are:
- Light Proof
- Reflective Walls
- Built-In Venting Options
- Light Hanging Options
- Waterproof Floors
Grow tents offer many features for helping your cannabis crop thrive while reducing the work involved. Often, tents are a less expensive way to make an effective growing area than trying to make your own growing boxes.
Indoor grow tents give you a way to make a fantastic indoor growing environment. Growing tents give the beginner an ideal growth scenario with the control you get using fans and filters.
The marijuana growing tent uses space efficiently and makes effective use of light and water. If you need the portability option or have a smaller budget, the indoor tent is a good growing space option.
Mediums for Planting Weed
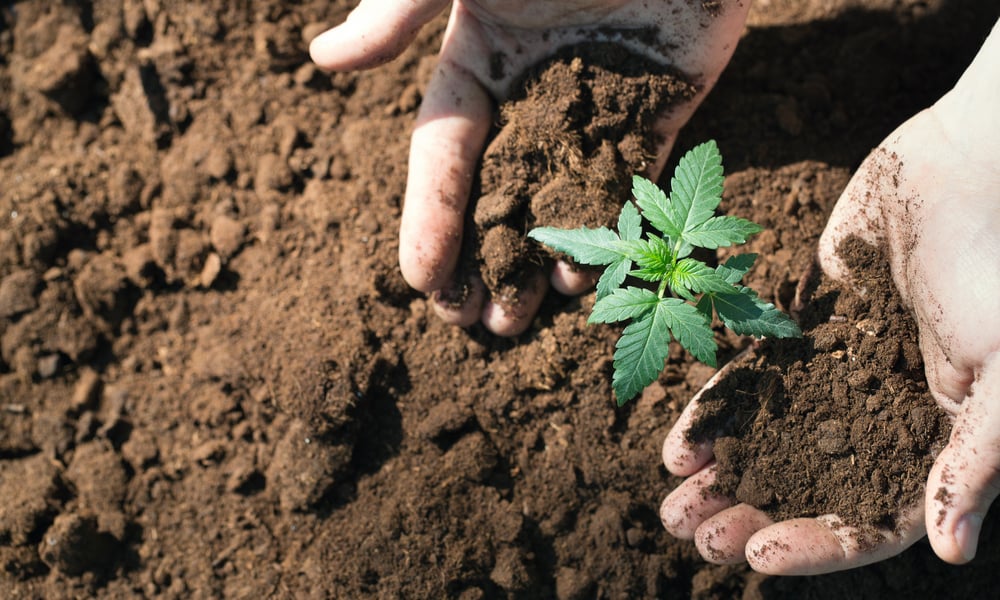
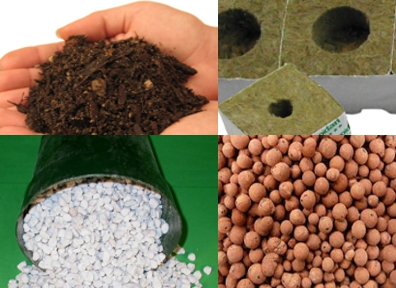 What to grow weed in or what mediums are best, is the next step in your marijuana growing endeavors. Growing cannabis in soil indoors is a common and cost-effective growth medium. Soil delivers the most reliable growth and is frankly, dirt cheap (excuse the cliché).
Another common growing method is hydroponics or growing cannabis in water instead of soil. The hydroponics water delivers all the necessary nutrients and minerals for marijuana plant growth through chemical solutions. However, hydroponics requires constant monitoring. Otherwise, one small chemical error can devastate an entire weed crop.
You have different hydroponic systems to choose from, but all of them let you grow weed indoors during any season. When done correctly, weed grown in water shortens the cannabis grow time while delivering high yield crops.
But growing marijuana by hydroponics isn’t cheap or easy, and there’s a lot that can go wrong. We suggest starting small, experimenting before deciding to invest in a large hydroponic setup. If you find growing marijuana in water works for you, start building your hydroponic system a little at a time.
The purpose of our growing marijuana guide is to keep it simple and make growing weed easy for the beginner. So, we begin our step by step weed growing guide with using soil as a growing medium. Using soil to grow weed gives you a potent crop under less risky conditions.
The Beginner’s Guide to Growing Weed
Now that we have the needed essentials out of the way, we’re ready for the beginner’s grow guide. It’s time to learn the process of growing weed that’s lush, green, and potent.
Our recommended beginner method that we cover extensively in this guide is growing cannabis from seed. While cloning is an option which we cover, the best way to grow weed, and the easiest, is through seeds.
The beginner’s success rate with seed germination is 85% or higher. On the other hand, growing a clone weed plant has a 50% chance or less, rate of success. Also, you need access to a grown marijuana plant to get a clone cutting.
Choosing Marijuana Seeds
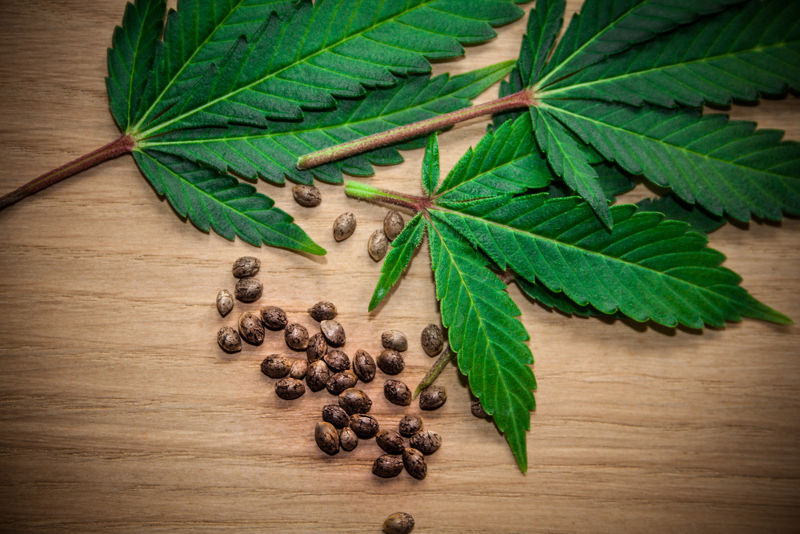 When it comes to marijuana seed growing, only the healthiest parent plants produce the top-quality seeds needed for healthy plants. The plants get their quality, height, color, and aroma from the seed and its parent plant. To get high-quality marijuana, you must start with high-quality seeds.
So, what do you look for when seeking good quality marijuana seeds?
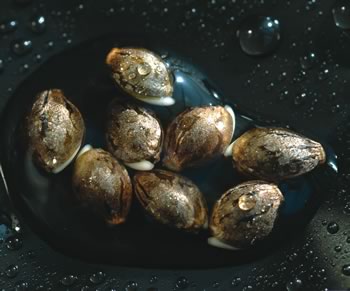
You want seeds with hard outer shells, which are mature and ready to germinate. Avoid using any seeds that are green, pale colored, or look damaged.
Mature seeds are teardrop shaped with a dark brown shell. Dark tiger stripes running across the shell are Indica seeds while a mottling of tan, black or brown are Sativa.
Marijuana seeds come in several variations or strains. Besides the seed strain, you need to choose between feminized seeds or regular seeds. Regular marijuana seeds produce female or male plants while the feminized seeds produce only bud-producing females.
Even with fully feminized seeds, you still have a five percent chance of producing hermaphrodites, or female and male flowers.
Cannabis Seed Germination
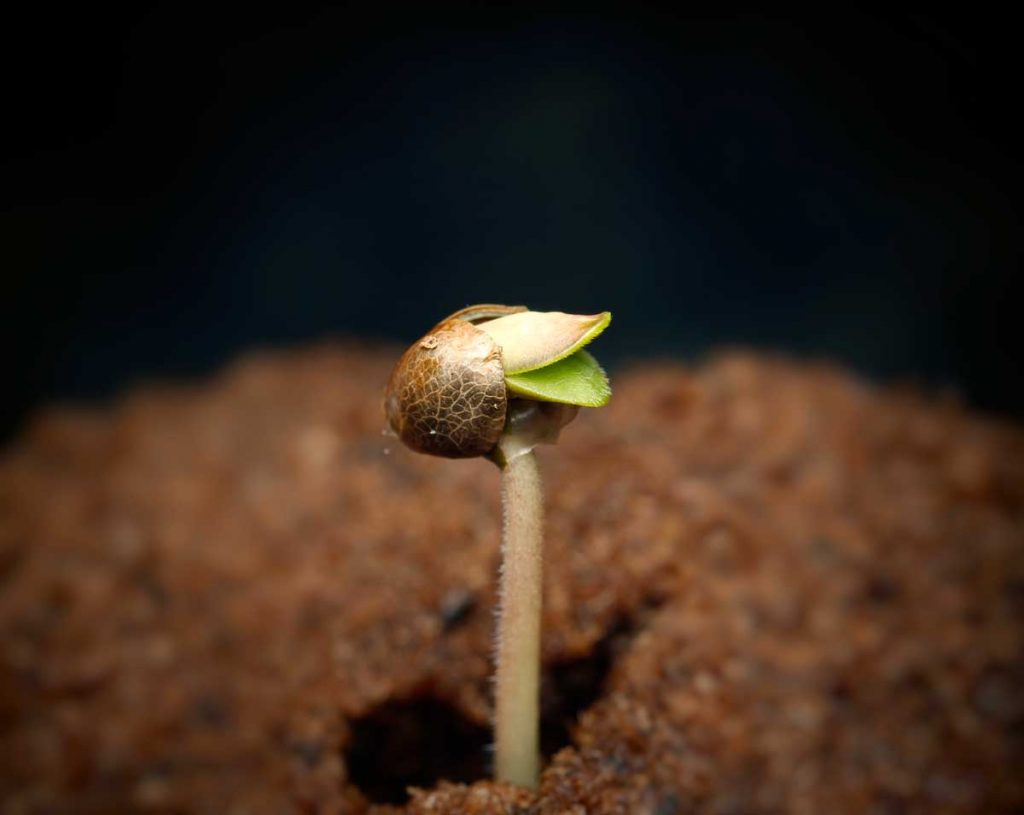 It’s time for learning cannabis seed growing methods or germination.
Germination means the breakdown of the seed’s outer shell when the sprout comes through and starts dropping downward. Giving seeds the correct air, warmth, and moisture guarantees a more successful germination.
Out of ten non-feminized marijuana seeds, only two or three germinate into healthy female plants. The remaining seeds either grow into male plants or spoil and rot. Always consider your seed losses and adjust your amount of germination seeds accordingly.
Germination takes from two to seven days and depends on seed quality, moisture, temperature and other environmental conditions. The best time for starting germination is during the hot months of the year.
Once your marijuana germination begins, start removing all undeveloped and male plant sprouts. You need to direct your attention to the healthy female plants. If you have a low population of female marijuana plants, start a second germination process. A growing mat helps with germination, but costs extra.
During germination, the white seed sprout continues growing longer. When the sprout reaches one-quarter inch, it’s time to transfer to a different medium. For a second medium, we recommend a growing tray or other pot where your plants have plenty of growth space. When your plants get large enough, you can transfer them to larger spaces like a garden or hydroponic setup.
The Methods of Cannabis Seed Germination
You can accomplish germination in several ways. But, the best way for a beginner weed grower to learn the germination process is to practice on common seeds. By practicing first, you don’t waste the high dollar marijuana seeds for newbie mistakes.
Here are the different marijuana seed germination techniques.
 Seed Soaking
Seed soaking, the most reliable germination method, only needs an opaque coffee cup or jar of warm water. Soaking is easy by following these simple steps:
- Place seeds in warm water.
- If you see any floating seeds, remove them. All seeds should stay submerged.
- Cover the coffee cup with a lid or plate, something that doesn’t allow any light to the seeds.
Seed germination starts within 48 to 72 hours. Sometimes seeds begin sprouting as early as 24 hours.
Soil Germination
 Germination works well in soil, and some weed growers prefer soil germination because it’s so easy and successful. Follow these simple steps for germinating in the soil.
Use a pot with a drain hole at the bottom and fill with soil for the marijuana seeds. We prefer clay pots. But, no matter what kind of pot you use, it must have a drain hole, so your plants don’t rot.
Dig an indention in the top of the soil surface and push a pointed object, like a pencil, down one-quarter inch.
Add the marijuana seed to the hole and cover the seed with dirt.
Spray the soil with water, keeping it moist but not soggy. Moisten the soil as needed until the sprout breaks through the soil.
Place in an area with a constant room temperature of about 78° Fahrenheit. The soil germination method normally takes five to seven days to sprout.
Propagation Kits
 If you want great results with a small investment, propagation kits are the answer. While each kit comes with a set of instruction, using each kit is similar. Usage involves pouring seeds into small compartments or pots, adding the included nutrient or hormone germination mix.
Seed starters or propagation kits consist of the following supplies:
- Waterproof tray to hold pots.
- Set of peat pots that fit the propagation tray.
- A transparent plastic cover for maintaining humidity.
- Heating mat for seedlings. The mat provides the needed warmth for seed germination.
These options come with the basic propagation kits. However, for a bigger investment, professional kits include self-watering and temperature regulation systems, grow lights, and ventilation controls.
Germinating with Paper Towels
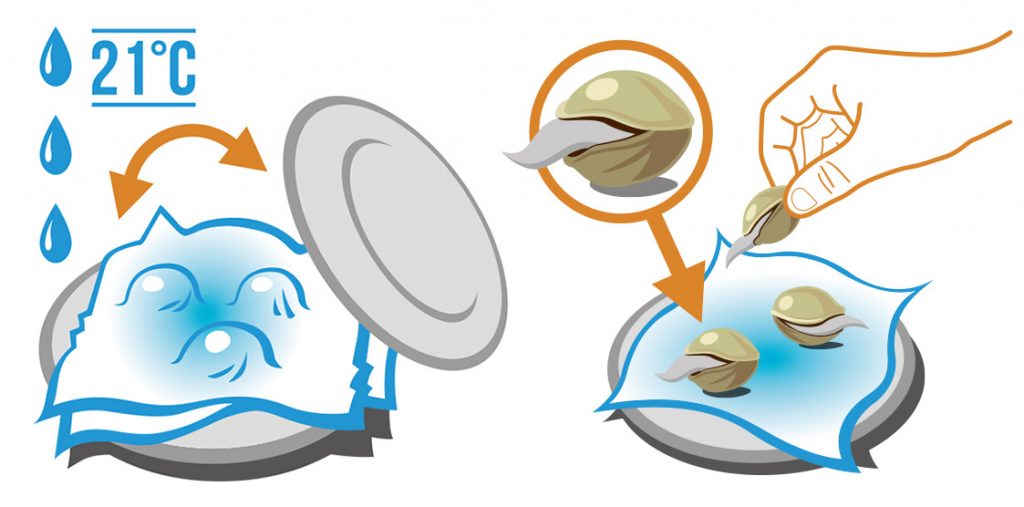 Germinating with paper towels is one of the simplest methods of weed seed growing. Paper towels give the seeds a warm moist area for germination and are inexpensive. All you need is some boiling water, two small plates, and two paper towels.
The five easy steps to paper towel seed germination:
- Start by boiling water and sterilizing your plates to get rid of any germs that might affect the seed sprouts.
- Soak the paper towels in hot water then squeeze out the excess, being careful not to burn yourself. You want your paper towels damp and warm.
- Place one warm damp paper towel on a sterilized plate and lay a few seeds on top. You can add quite a few seeds, but you need enough space between them for sprouting.
- Cover the seeds with the second warm damp paper towel and set the second plate over the top. By covering the plate, you keep light from entering the seedling area.
- Place seeds in a warm dark place, like a closet or cabinet. Let seeds germinate two to five days, checking for sprouts each day.
It’s important you don’t leave the germinated seeds on the wet towel after sprouting. Therefore, we recommend checking your seeds each day. Remove sprouts from the towels and plant as soon as the sprout tip shows.
Peat Briquette Germination
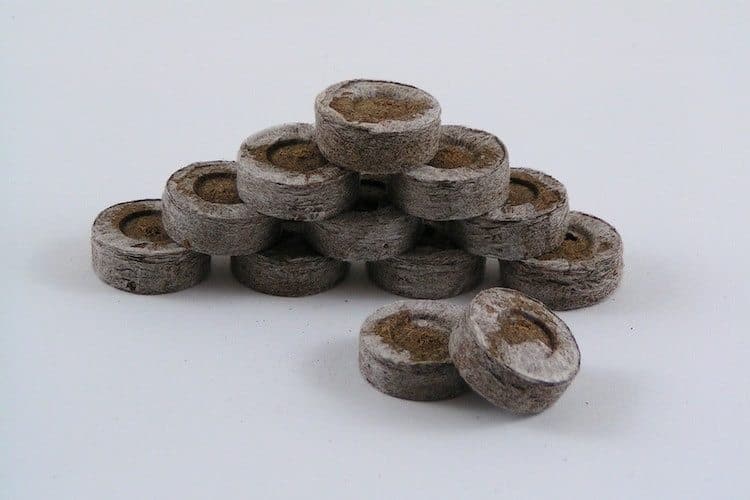 One of the most reliable and safest methods of marijuana seed germination is using peat briquettes or starter cubes.
Start your germination by soaking peat briquettes in water until they swell, about five minutes. Make a 0.4-inch deep center hole and put the marijuana seed in the hole and cover with the loose dirt mix.
Keep the peat bricks moist and warm but not hot. Between 68° and 82°, Fahrenheit is a good temperature for cannabis seedling growth. Don’t keep your seeds too warm or you get slow growing and sickly baby weed plants.
Starter cubes have a 95% success rate and the marijuana germination time is about three to eight days.
Rapid root is a highly recommended peat starter cube. These seed starter plugs have less sprouting issues and work in any growing medium. The starter cube already has a planting hole. Just put the seed in the precut hole, pinch the cube top closed, and wait. This germination method is super easy for sprouting marijuana seedlings.
Any of the germination mentioned above methods work well for weed plant sprouting. Choose the method to grow cannabis from seeds that best suits you and your long-term goals. It’s not as difficult as it sounds to grow marijuana seedlings.
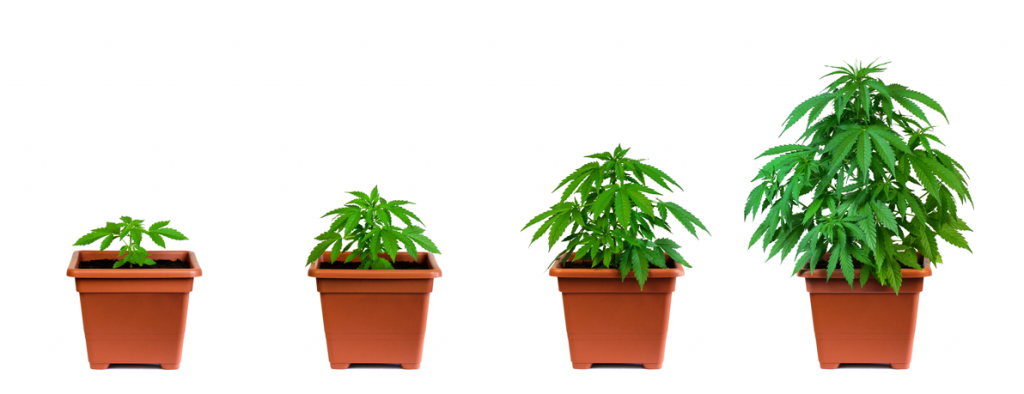
Cannabis Seedlings
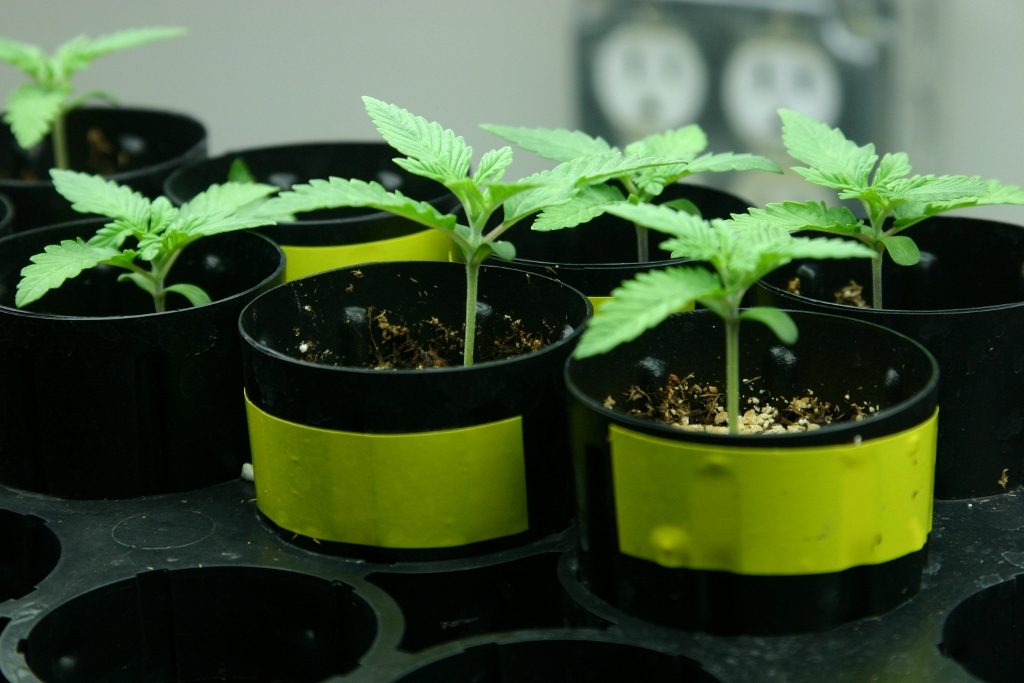 Now it’s time to understand the weed seedling stages. Once your seed sprout reaches one-quarter inch long, you’re ready for replanting. It’s time to move to a pot large enough for the marijuana plant growth stages.
Marijuana seedlings consist of two leaves known as the cotyledon or seedling leaf. The cotyledon exists to store food for feeding during the stages of marijuana plant growth and maintaining plant health. Once the plant grows its real leaves, the seedling leaves grow pale, turn yellow and drop off.
At this marijuana growth stage, your young plans need intensive care for their continued growth. It’s important to monitor the light your plants get and never make the mistake of overwatering.
Marijuana plants need about 16 hours of light each day. The best grow bulb light setting combination is 15/30/30 or 15% red, 30% white, and 30% blue.
To the first-time grower, the growing stages of weed plants seem slow. However, a lot is happening underground. At this growth stage, the plants are developing their root system. During this development stage, it’s important not to try and speed up growth by over watering or fertilizing or you may kill your pot plants.
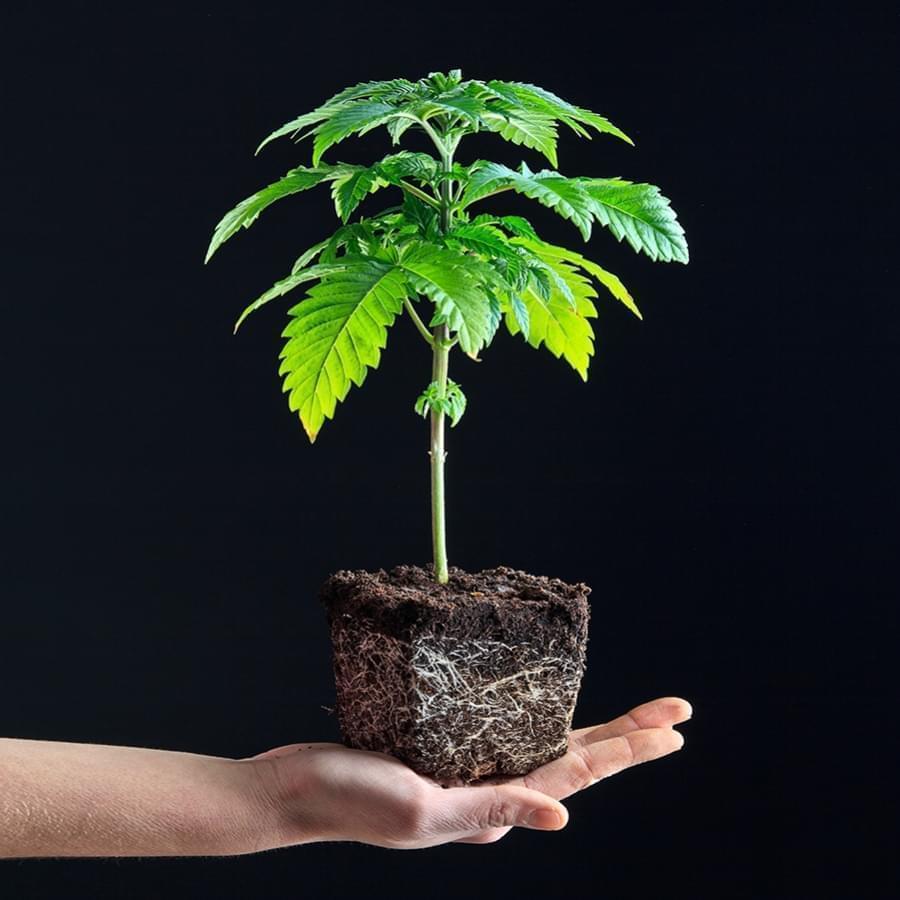
Transplanting Marijuana Seedlings
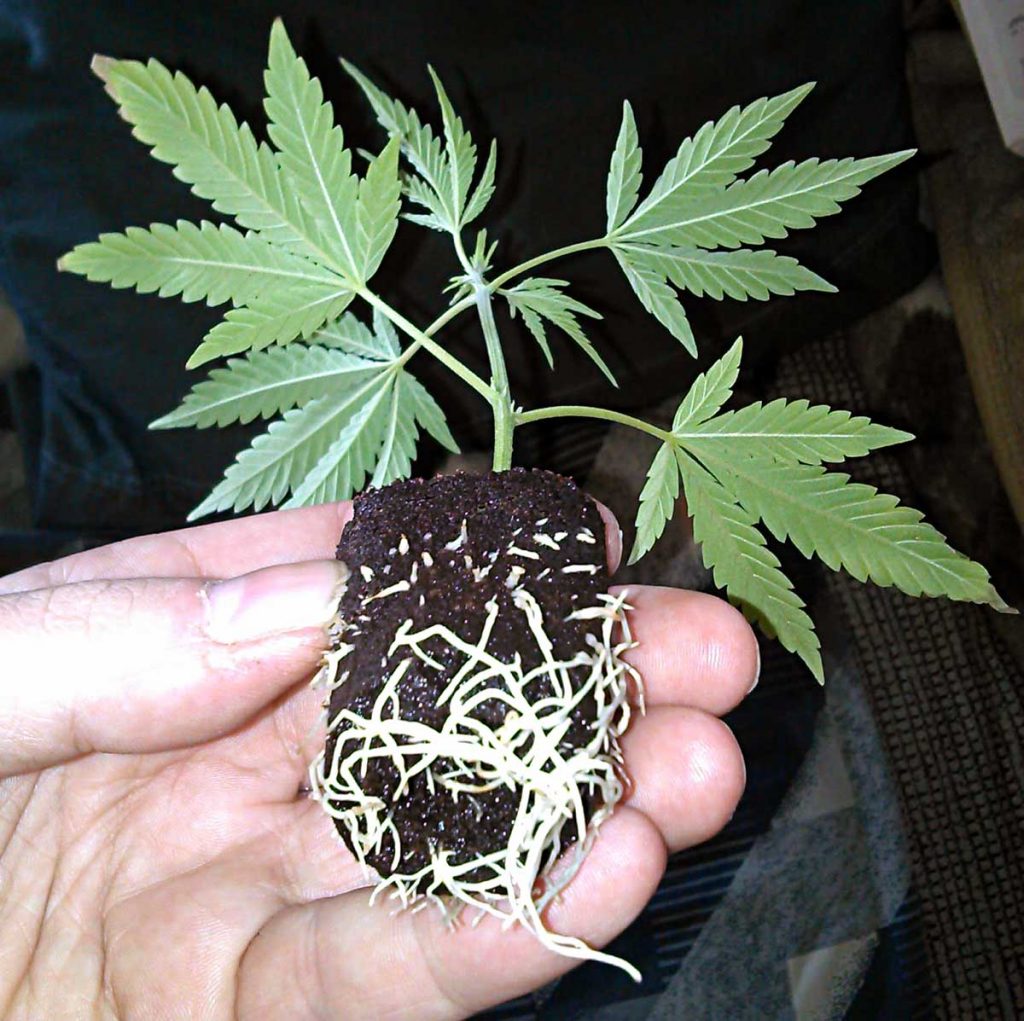
![]() Taking a lot of care during transplanting time is important. If not done correctly, transplanting can cause a lot of stress and damage to the marijuana plant. We recommend transplanting at night. Nighttime transplanting lets the plants recover and rest before the light starts the photosynthesizing and growth process again.
Taking a lot of care during transplanting time is important. If not done correctly, transplanting can cause a lot of stress and damage to the marijuana plant. We recommend transplanting at night. Nighttime transplanting lets the plants recover and rest before the light starts the photosynthesizing and growth process again.
Avoid causing your plants stress when transplanting by following these steps:
- Do not transplant until after the roots start filling the container. The roots should hold the growing medium together, but shouldn’t wrap around the edges. If roots are wrapping around, your plants are rootbound. It’s better to transfer seedlings too early than too late.
- Two days before transplanting, water your cannabis plants to keep the growing medium together for easier sliding out. Easy slide out helps keep the roots from getting damaged.
- Carefully move the root ball to your growing pot, avoiding moving the roots if possible. There’s no need to shake off any of the dirt surround the roots.
- Have your plants in their final growing pot 1-2 weeks before they switch to the flowering stage. To avoid the stress that affects the final yield, never transplant while your plants are budding or flowering.
- If plant growth slows or the leaves drop, it’s possibly shock from transplanting. Use a seaweed kelp liquid fertilizer for a quicker recovery.
- To avoid transplanting cannabis seedlings, you can clone or plant your seeds in the destination pot. However, don’t overwater and increase soil oxygen levels by adding more perlite. The extra perlite loosens the soil, allowing easier water
- For best results, keep your cannabis plants watered regularly.
Here is a chart to give you an idea of the gallon-sized container you need for the desired plant size:
- 12-inch plant: 2-3 gallons
- 24-inch plant: 4-6 gallons
- 36-inch plant: 6-8 gallons
- 48-inch plant: 8-10 gallons
- 60-inch plant: over 10 gallons
Monitoring Needed for Marijuana Growing Stages
 Once you enter the final weed growing stages, your plants are gaining strength. However, there are still a few growing weed basics to understand.
Your marijuana plants need monitoring for nutrient deficiency and excess. Both nutrient conditions have common symptoms. Various plant discolorations, lightening then yellowing of mature leaves, and spots are all signs of a nutrient problem.
Sometimes, the marijuana plant stems look purple. This coloration is normal and caused by the plant’s genetic makeup.
Normally, by the third to fifth week, you can determine if you have a healthy cannabis plant. At this stage in the growing cycle, a healthy plant is a vibrant green with dense and strong branches.
There are a few differences between cultivating female and male plants. Female plants, for instance, like low nitrogen levels while male plants prefer high nitrogen levels. Levels too low in a male plant and the leaves start turning lighter and yellowing.
Potassium affects male and female plants differently with male plants growing better with higher potassium levels and females with lower. When potassium levels drop too low, leaf tips start turning brown or get a burnt look. The leaf edges turn yellow and the longer the level is off, the further the yellow discoloration travels.
Excess nutrients, or nutrient burn, happens in both male and female plants, just at different levels. If you don’t correct the high nutrient levels, the leaf tips start turning yellow and brown. As the nutrient excess continues, the discoloration travels further into the leaves, and the tips start curling and become brittle.
Temperature and Humidity Levels
 If you grow your plants indoors, you must control the temperature and humidity. The female plant growth rate increases with high humidity and low temperature while males prefer low humidity and high temps.
Female Plant Humidity and Temperature Levels During Growing Stages
Seedlings: Grow lights at – 20°-25° C and 60%-70% humidity.
Vegetative: 22°-28° C and 40%-70% humidity.
Flowering: 20°-26° C and below 55% humidity.
Late flowering 1-2 weeks before harvest: 18°-24° C and 30%-40% humidity.
Light Setting for Growing Indoors
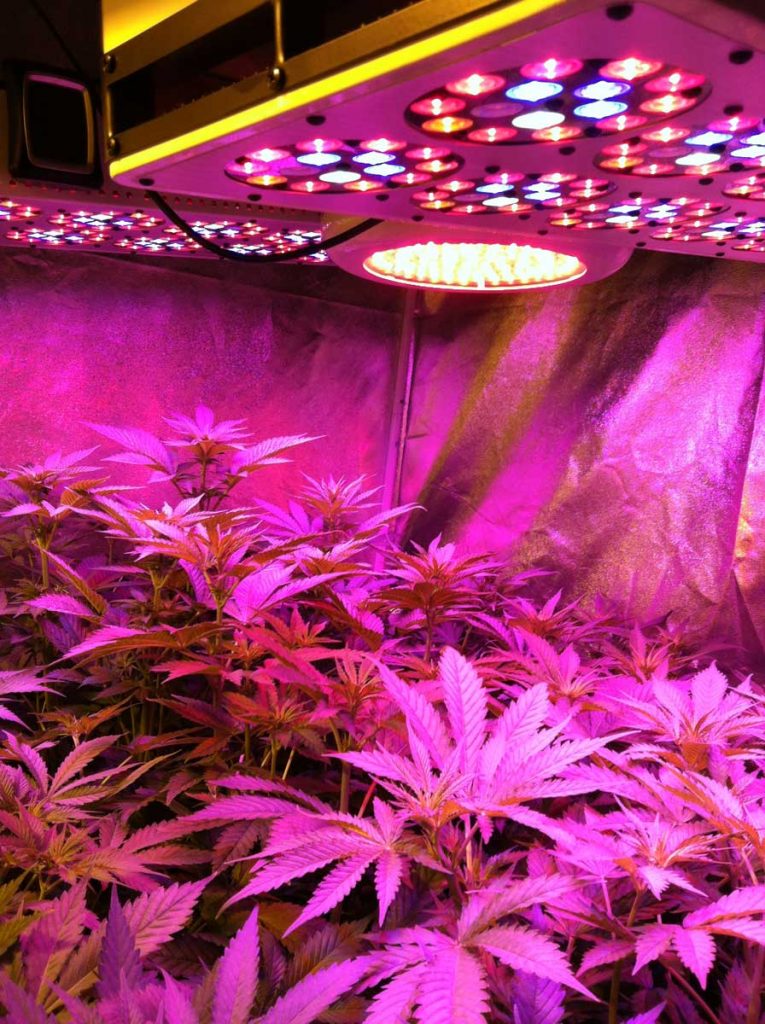
When it comes to lighting, for female plants and large healthy buds, you need a blue spectrum light. Blue spectrum helps boost female plant growth rates for strong, healthy, and large leaves. On the other hand, red spectrum light energy promotes budding once your plants enter the flowering stage.
Seedlings: 15% red / 30% blue / 30% white. After leaves appear and seedling has been above ground switch to a light spectrum mix of 30/60/60.
Vegetative: Plant type governs the spectrum settings. Always check recommendations when you buy seeds. 30/60/60, 45/80/80, or 60/100/100 recommendations.
Flowering: 100/100/100.
Late Flowering Plants: 100/70/100.
These are possible combinations since light spectrum settings may vary by grow light manufacturers. Check the information included in your grow light.
Growing Weed Seedlings into Mature Plants
 This section of our guide to growing your own marijuana covers three main topics for successful harvests. We will give you the information needed for becoming a skilled weed grower. You can choose the medium and method to grow weed indoors.
The three main topics for growing seedlings into mature plants are:
- Growing Using Soil Germination
- Growing Using Cloning
- Growing Using Hydroponics
Of the three growing methods, we recommend soil germination. Using soil for cultivation has fewer risks and is more cost effective making this method perfect for beginners.
Growing Using Soil Germination
 The direct soil method is the most frequently-used germination techniques. Soil germination is not only very cost effective, but since you don’t transplant, it’s the easiest method for beginners. The most important key to growing healthy plants with this germination method is using top-quality soil.
Choose a lightweight soil that makes it easy for your seed to sprout and break through the dirt. Roots can’t easily penetrate the solid soil. Hard packed soil leads to slow plant growth, which is why you need lightweight soil.
Start your soil germination using these three simple steps:
- Dig a hole about .40-inches deep or 1 cm and place the cannabis seed inside.
- Add enough soil to cover seeds completely, but keep the dirt loose without compacting it.
- Cannabis seeds germinate beneath the soil before sprouting in four to ten days.
Once you have your seeds planted, it’s important to keep them in the right environment. You want the area ventilated yet damp and kept at the right temperature.
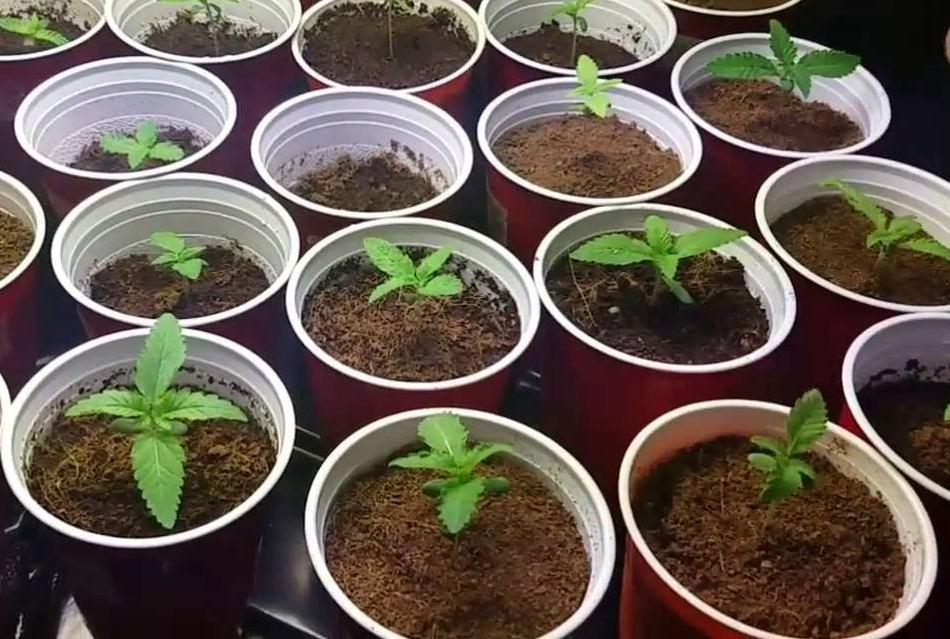
If using soil germination for growing marijuana from seed, you can plant directly in the ground or a container. For beginners or anyone not planning to grow for money, growing marijuana in a pot is ideal. Growing containers make it easier to handle plants with less risk of plant and root injury.
Container Growing
 One of the best things about container growing is it lets you look after each plant individually. Individual care means easier identification of sickly or poor-quality plants, early in their growing cycle.
You can use almost anything as a marijuana container. Consider small pots or buckets, wooden boxes, plastic pans or anything else that leaves enough room for the root system. Your container needs a half inch hole in the bottom for draining excess water and getting air to the roots.
The only requirement for a container is you must use a dark one, preferably black. Dark containers keep light from getting to the roots and killing the plants. If you have used plant buckets that you bought shrubs and trees in, they make ideal pot plant containers.
Most growers like starting with small containers since they are easier to handle. However, as the root system grows, you’ll need to transplant to larger pots. Usually, when your plants enter their rapid growth stage, it’s time to transplant before they become rootbound.
DIY Pot Plant Container
You don’t need to buy growing pots when there are so many free items easily adaptable to housing marijuana plants. Just drive around, and you’ll find a supply of rejected flower pots, large bowls, big bottles, or wooden boxes. After bringing home your planting containers, thoroughly clean them and cut the drainage holes. However, whatever you use should keep light out and preferably be a dark or black color.
Choosing the Soil Type
When growing weed in the soil, the type of soil you use is the most important consideration.
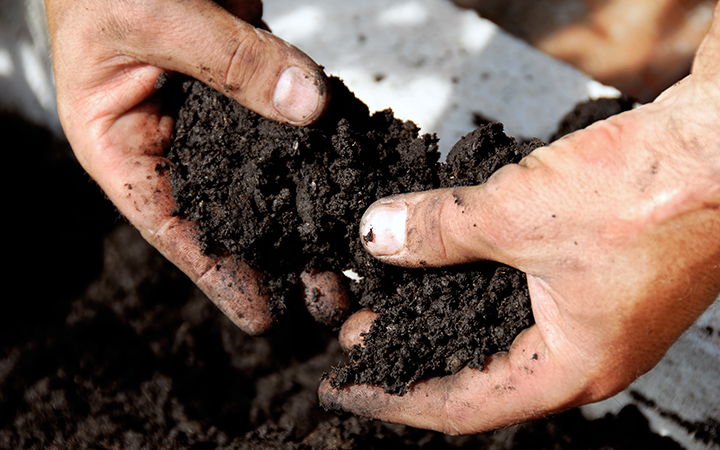
There are four soil factors to consider when selecting the right soil. These factors are soil texture, water drainage, PH levels, and nutrients. Your best-growing soil choice that contains all these factors for a top-quality cannabis crop is organic soil.
Texture plays a major part in the stages of growing weed. Look for a soil that has a light and fluffy texture. You want a soil that easily drains the water, yet still, retains enough to keep your plants thriving.
Avoid Miracle-Gro or any extended release soil for growing weed. These soil types release nitrogen to the plant roots for six months. Nitrogen causes deficiencies that burn the cannabis plants during the budding stage which reduces yields. Growers have successfully used Miracle-Gro during the early stages of marijuana growth. However, once their plants reached the flowering stage, they had issues with maintaining correct nutrient levels.
Nutrients Needed for Growing Marijuana
 The two main stages of marijuana plant growth where nutrients are important are the vegetative and flowering.
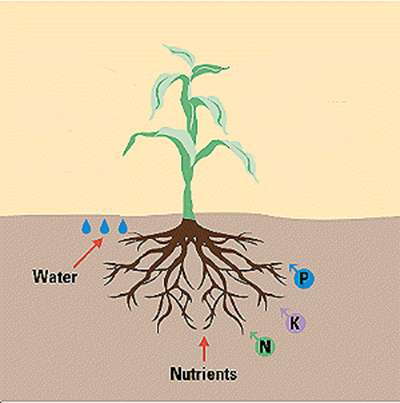
Nutrients needed for good marijuana plant growth are nitrogen, phosphorus, and potassium or NPK.
Nitrogen: The most essential of all the nutrients, nitrogen helps nourish stem and leaf growth. Nitrogen is a major amino acid component used as green chlorophyll, protein, and enzyme building blocks. Too little nitrogen causes:
- Slow and stunted growth.
- Yellowing leaves.
- Purple tinted stems and leaf undersides.
Phosphorus: This nutrient plays an important role in the transfer and storage of energy. Phosphorus allows the plant to accumulate and use energy for growth. Too little phosphorus causes:
- Slow and stunted growth.
- Small leaves with blotches.
- Red or purple leaf stems.
- Dark colored leaves that curl downwards.
Potassium: Many critical processes require potassium, including cell wall development, flowering, and water uptake. Potassium ensures the continued free flow of sap which moves water and nutrients through the plant. This nutrient also aids in insect, disease, and environmental stress resistance. Too little potassium causes:
- Dull looking and yellowing leaves before developing rust-colored
- Brittle and weak stems.
- Curling leaf tips and burnt looking leaf edges.
All plants need the same basic nutrients for growth and reproduction. However, with the higher investment in cannabis growing, we recommend using specialized marijuana nutrients.
Watering Weed Plants
 The amount water needed for marijuana plants depends on the container size and light intensity. High-Intensity Discharge lamps or HID lamps, give off a high level of heat that affects the water levels in plants.
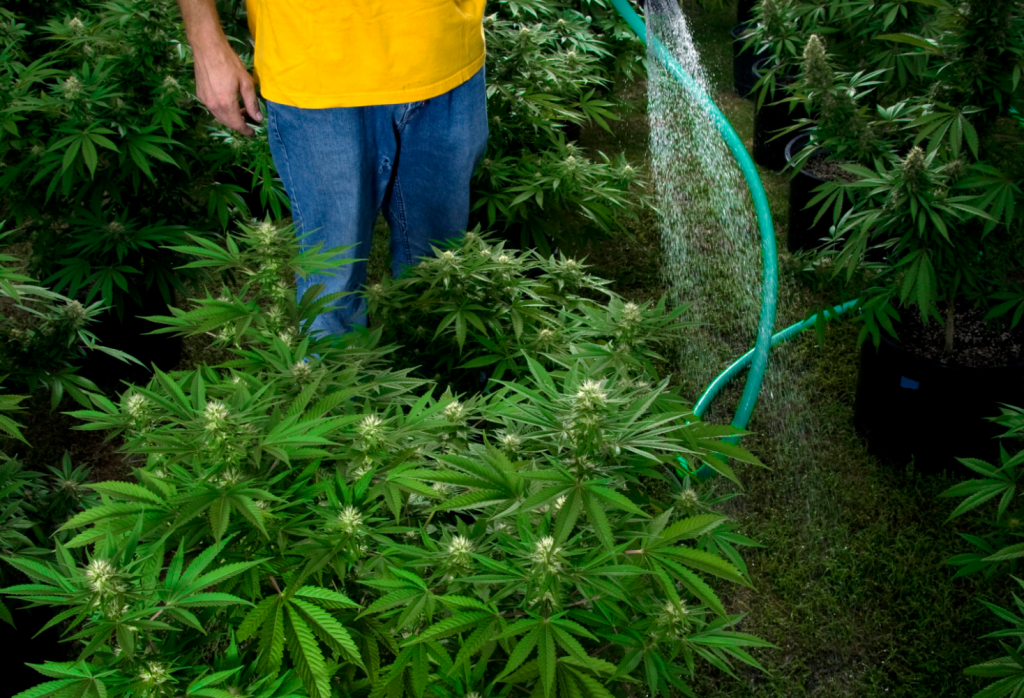
Marijuana crops need watering every other day or when the growing medium starts feeling dry about knuckle deep. Also, roots need air, so you don’t want your roots living in a soggy environment. Balancing between sogginess and dehydration is sometimes a fine line, making understanding water needs vital for plant health.
A good water standard to follow is water until 20% drains out through the container’s drainage hole. Make sure you empty the tray that catches water runoff, so the soil doesn’t reabsorb it.
Monitoring Soil pH Levels
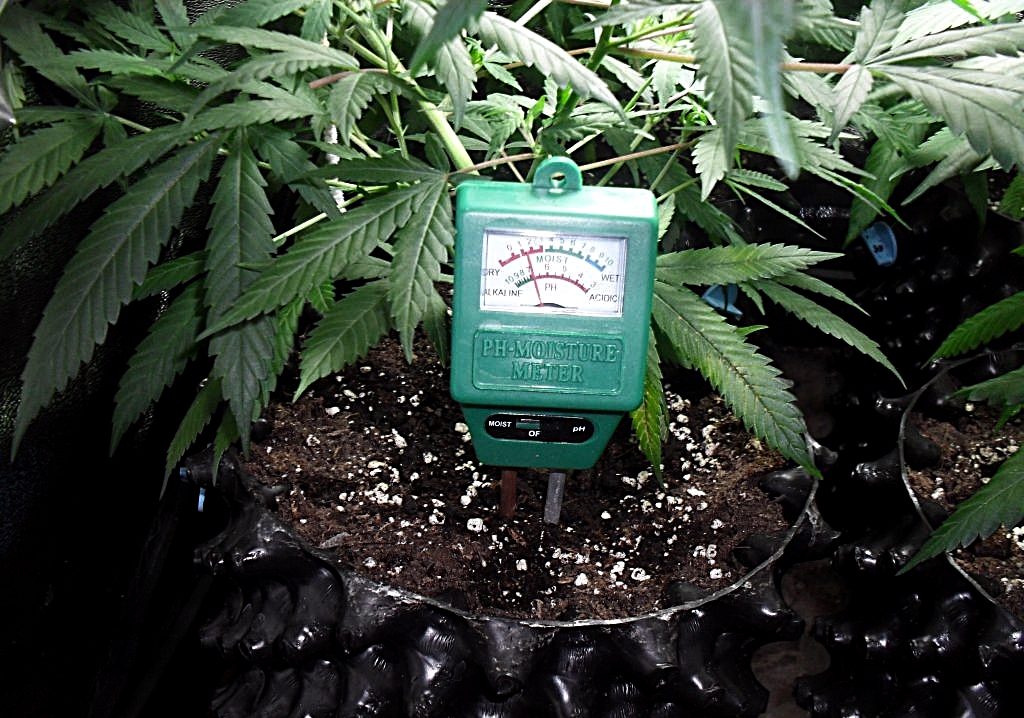 pH levels determine how acidic or alkaline the soil is and is measured on a 1-14 level scale. For a healthy cannabis plant, you need careful pH level monitoring. The ideal pH condition for marijuana is a 6.7 to 6.2 level. Not maintaining correct pH levels lead to whole crop devastation. A weed grower can measure pH with tester drops or digital pH pens.
Cannabis has a natural like of slightly acidic root conditions. The slight pH acidity found in the wild cause cannabis to thrive. This proper pH level at the roots is what helps the plants get the nutrients needed for healthy growth. If the root environment pH is too low or too high, the plants can’t absorb the nutrients they need.
By managing your marijuana pH levels, your plants have less risk of developing nutrient deficiencies and leaf problems. When the growing medium nutrient levels are good, weed plant growth is faster and has bigger yields.
Overfeeding with organic compounds and fertilizers can cause pH level disturbances. Before using any fertilizers on your pot plants, be sure to do research. As for choosing a fertilizer, go simple. A common manure fertilizer works well without going to the expense of super ultra-nutrient fertilizers.
When pH levels are out of balance, growers are normally alerted before it becomes a problem. With the warning signs that the pH is off, you can fix it before the leaves begin suffering from the deficiency.
Methods for Growing Weed Plant Clones
 Now that we’ve covered the main weed growing process in soil, the only topic left is lighting. However, our guide to growing marijuana covers lighting later since it covers all weed growing techniques. First, we want to discuss cloning.
What is Cloning?
Cloning is a method that propagates plants using asexual reproduction by cutting then rooting healthy plant shoots. The cutting and rooting process create a plant clone.
Growing clones is perhaps the smartest of the marijuana growing techniques. The cloning method is a popular way of growing marijuana that farmers and most indoor growers prefer.
Start growing from clones by choosing a donor or mother plant, take some cuttings and grow in a separate medium. With only one parent plant, the clone is an exact genetic copy of the original plant.
The biggest advantage of cloning, and why seasoned growers prefer this method, is that all the clones become female plants. Also, cloning allows you to select plants with different desirable traits like pleasant flavors and high yields.
Cloning Benefits
- Time-saving process no waiting for seeds to germinate.
- Saves money with no seeds to buy.
- Guaranteed female plants.
- Faster growing than seedlings.
- Less time to get to the flowering stage.
- Easier to grow several plants at once due to less grow time.
- Final product characteristics are the same or better with each cloning.
Cloning Disadvantages
- Genetic uniformity makes clones more susceptible to disease and pests.
- Less plant breed variety. Need a mother plant for each different breed.
- Finding outside sources for good quality cuttings is difficult.
- Must have a high-quality mother plant or you get inferior clone plants.
- Clones are very sensitive, and the death rate is high.
- Since all plants are female, future breeding is a problem.
How to Clone a Marijuana Plant
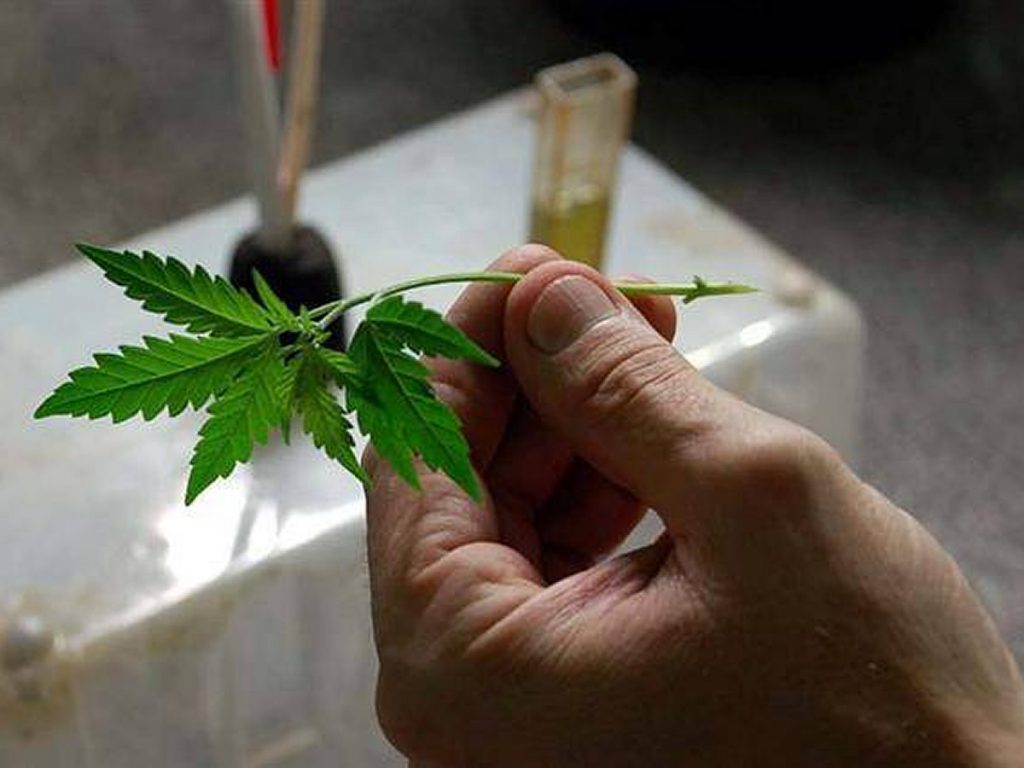 If you want to learn how to grow a clone, below is an easy step-by-step guide to marijuana cloning techniques.
Beginning Preparations
Carefully choose the mother plant. All future weed plant clones come from this plant so choose a mother that’s healthy, productive and disease free.
Cut at least fifty percent more clones than what you need. If you want ten plants, you need at least fifteen cuttings. It’s common for some cuttings to die from shock.
The best time to cut your clones is before the mother plant starts flowering. However, you can cut the clones at any time.
Wash hands with an antibacterial soap and clean and sanitize your tools, growing containers, and potting area.
Use a pH balanced growing medium to plant your cutting in.
Keep all planting tools, and clones close together when planting. Exposed clones wilt quickly, so you want everything close at hand for a fast transfer.
Materials Needed to Grow Weed Clones
- At least one mother plant
- Standard black potting tray with dome tops
- Cutting medium like rockwool (most common)
- Grow-Tech heat mat
- Fluorescent shop light
- Micronutrient like Superthrive (Do not use in flower)
- Bloom formula organic food
- pH Up
- Gel rooting hormone
- pH meter or combination pH-PPM-temp meter
- Sharp scalpel or new razor blade
- Pencil or wood piece for tamping rockwool around plant stems
- Clean water, preferably distilled but not necessary
- 5-gallon bucket
Taking the Cutting
Start by making sure all your supplies are clean and laid out within easy reach. Cuttings are fragile, so you need to work quickly.
- Fill the 5-gallon bucket with clean water and add one teaspoon of Superthrive and six teaspoons of bloom formula. Add 1-5 teaspoons pH Up to get a pH meter reading of 5.6 pH.
- Place rockwool slab in growing tray and fill with nutrient water. Let soak to remove air bubbles. Placing your hand over the rockwool, turn the growing tray a full 90 degrees and pour off excess water.
- When selecting cuttings, choose actively growing tops for your clone plants. The appropriate clone cuttings must have two to three branches or nodes, with fan leaves. Train yourself to look for two leaves and a growing top. Cut the lower node at the stem with a cutting length of 2-8 inches long.
- Dip the cutting into the rooting hormone, coating at least the lowest node and insert into a rockwool cube. Using your pencil, gently close the rockwool around the freshly cut stem and place in growing trays. Closing the rockwool adds stability and keeps the cutting from drying out.
- To keep the clone focused on creating roots, clip large leaves in half.
- Once you’ve got a bunch of cuttings (always cut at least 50% more than planned), cover trays with dome covers. Cut a few breather holes in the top and place on a heat mat and put in a safe place underneath the fluorescent shop light.
- Remove dome after one week and double the light exposure. Keep the light on clones for 18 to 24 hours each day. However, lift the lid daily for air exchange and water every 2-3 days. Don’t over water.
Growing Your Clone Plants
Now that your clones are at the two-week mark, you should see the tiny white roots breaking through the root cube bottoms.
It’s time to start light feedings with a bloom formula which helps increase root development, getting ready for mature weed plants.
It’s also time for transplanting marijuana clones. Plant your clones into larger rockwool cubes for hydroponic, aeroponic, or coco coir systems or in other containers.
You’re now ready to start the feeding regime for the vegetative stage. The clones remain in a vegetative state for two weeks while they fill out before entering the budding stage.
It’s not uncommon for the clones to wilt. Monitor the lighting closely. You don’t want the light too bright. Keep the light at a gentle level with a recommended percentage of 35/45/45.
By following the criteria in our steps of growing weed by cloning, you should successfully cultivate clones.
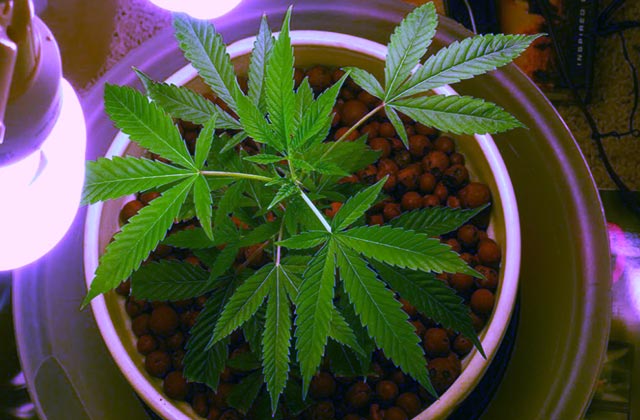
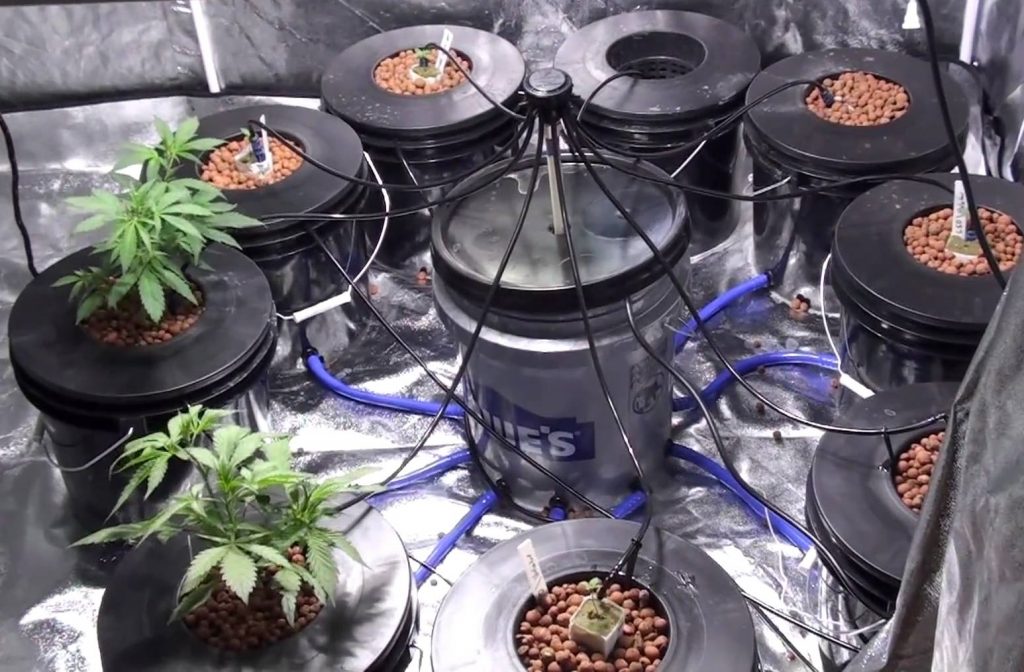
Hydroponic Weed Plants
 Growing weed in water, also known as hydroponics, offers the greatest crop yield results. However, as with all marijuana plant growing methods, there are advantages and disadvantages. Before going into the steps to grow marijuana, we will cover the pros and cons to help you make an informed growing decision.
Hydroponic Pros
- A clean process without the need for soil.
- Eliminates environmental pollution due to a controlled system.
- Higher amounts of top-quality weed production.
- Growth time greatly reduced.
- Limited to no root drowning or dry spots due to the monitored and controlled system.
- Water stays in the hydroponics system, reducing water costs.
- Less cost for nutrients due to the controlled system.
- Easy to prevent disease and insect infestation.
- Can grow marijuana indoors, in any room with the right system.
Hydroponic Cons
- Hydroponic systems are expensive, adding cost to growing weed.
- The system needs regular monitoring.
- If your electric goes off, the system goes down.
- Not very forgiving of mistakes. One mistake can ruin the whole crop.
Steps to Growing Weed Hydroponically
 Now we’re going to show you how to grow hydroponic weed step by step. Since growing with a hydroponic system is a little tricky, make sure you follow each step, in order.
In this chapter, we cover preparing, lighting, ventilation, temperature, humidity, nutrients, vegetation and flowering, and harvesting.
Preparing for Hydroponics
- Have all your supplies gathered, sterilized, and ready to go before beginning. Having to stop the procedures to find your pH meter can have a detrimental effect on your plants. Supplies needed are:
- Seeds or clones
- Hydroponic nutrients
- Containers or pots
- Growing medium like Coco Coir
- Lighting system; HID, LED, or fluorescent
- pH detector
- Timer
- Semi-gloss white paint
- Mylar (Optional)
- It’s important to prepare the walls of the growing area to give your weed production a boost. Growing the plants inside means you must give them the right amount of light. By painting the grow room walls white, it reflects the light source back onto the weed plants.
- Instead of painting the walls, line them with mylar or use mylar to make a grow box or grow tent. While mylar is highly reflective, it also reflects heat. Use caution when using mylar, so you don’t burn your plants.
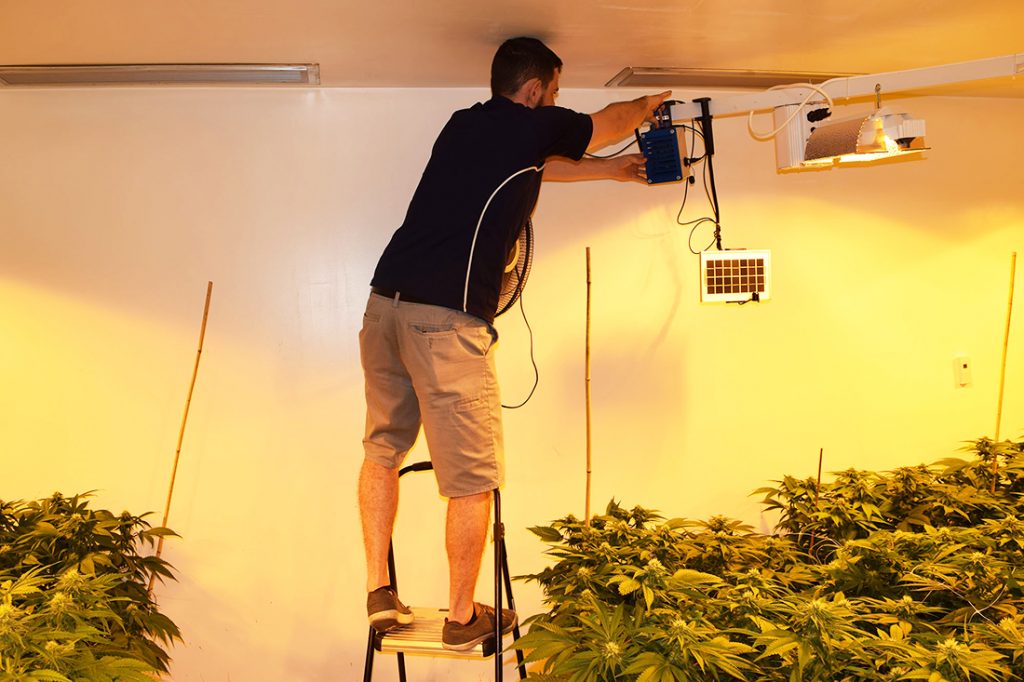
Lighting
 Hanging the lighting gives your plants the best light coverage. All grow lights come with instructions that give suggested heights covering each growth stage.
Since some marijuana strains need more light than other strains, check any instructions included with your seeds or plants for the correct lighting numbers. With HID or High-Intensity Discharge growing lights, you need 40 watts per square foot.
When using LED grow lights, look at the PAR value or Photosynthetically Active Radiation. PAR refers to the light the spectrum absorbs and uses for photosynthesis and ranges from 400mm to 700mm.
The full cycle LED lights produce PAR values needed for all growth stages of cannabis. The higher the PAR value, the better the coverage of usable light for photosynthesis. When shopping for LED lights with high PAR values, also look at spectrum output. A full spectrum light is ideal for growing marijuana.
Lighting is a careful balance because too much and you overheat your plants. Marijuana grow lights and their even distribution, PAR, and other ratings and measurements go deeper than what we cover here. However, for a beginner, this information is simple enough to get your weed crop growing.
After you have your area ready to go and your lighting setup up, just add your clones or marijuana seeds. Keep your lights about 4-inches away from the pots at the beginning.
Temperature – Humidity – Ventilation – Nutrients – Water
Humidity: Learning to measure and control the humidity and temperature correctly is vital to growing healthy plants. For successful growing, you need a maintained temperature of 90° Fahrenheit or less.
Ventilation: The most important requirement in an ideal growth environment is proper ventilation. If the marijuana growing room air is unmoving and stagnant, your plants can’t breathe. This closed-in environment also breeds pests and disease, and your plants become structurally weak. Also, improper ventilation, dehumidification, or air conditioning, means too much humidity as well.
Nutrients: During the first week, feed your plants nutrients at the one-quarter strength and slowly work your way to full strength. It’s best to follow the manufacturer’s directions exactly when feeding nutrients.
Water: When you don’t use nutrients, pH the plain water before feeding your plants. When you water, you want to make sure you get a 20% extra water runoff from the container bottom. Don’t over water, and only water when the top of the planting medium starts feeling dry.
Always remember, feed your marijuana plant with plain pH water every other watering or about once a week. Using plain pH water reduces the salt buildup, preventing nutrition problems. If you see signs of plant droop, chances are you’re under or over watering.
Vegetation and Flowering
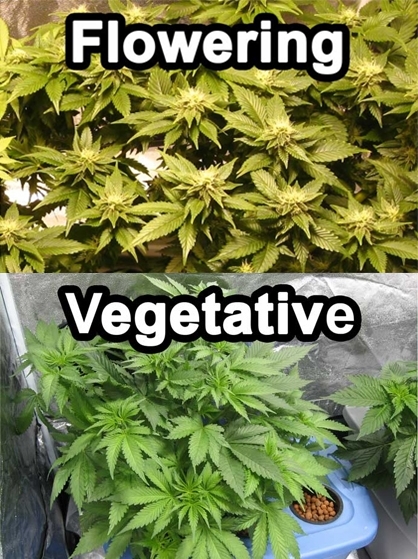 After seeding, the next important stage of the marijuana plant’s life is the vegetation and flowering stages. You must have the perfect environment during these stages for maximizing the yield and yield quality.
For judging growth time, use plant height, during their vegetative stage, as a determining factor. Plant height doubles during the flowering stage so leave plants in the vegetative stage until they reach 6-18 inches. At eighteen inches, it’s time for the flowering stage.
Plants enter the flowering stage within two weeks, and you can determine the sex of your plants now. During this stage, balancing the light is important. Your plants need twelve hours of light each day after they start flowing.
White hairs start growing around the branches or nodes on the female plants. These hairs turn into white, wispy shoot-like pistils. The male plants grow small, visible grape looking balls, forming bunches or pollen sacs. These pollen sacs may have the shape and color of a banana bunch.
During the flowering stage, you want to look for hermaphrodites, both male and female pre-flowers on the same plant. Continue monitoring the pre-flowers before judging the sex to rule out hermaphrodites.
Once you determine your plant’s sex, remove all males and hermaphrodites to avoid pollination. Continue monitoring plants for stressed females that might grow yellow pollen sacs. These banana shaped sacs produce pollen from the beginning. Separate these plants from the rest. If you see too many sacs, begin harvesting now to avoid more crop loss.
Once your plants start flowering, you practice your patience as you wait for your plants to mature. The length of maturity growth time depends on the system you use and marijuana strain you planted. The common waiting period is six to twelve weeks or more.
Harvest Time
Stop feeding and only give your plants plain water, one week before harvest. Using feed or nutrients during this week affects the taste of the weed when smoking.
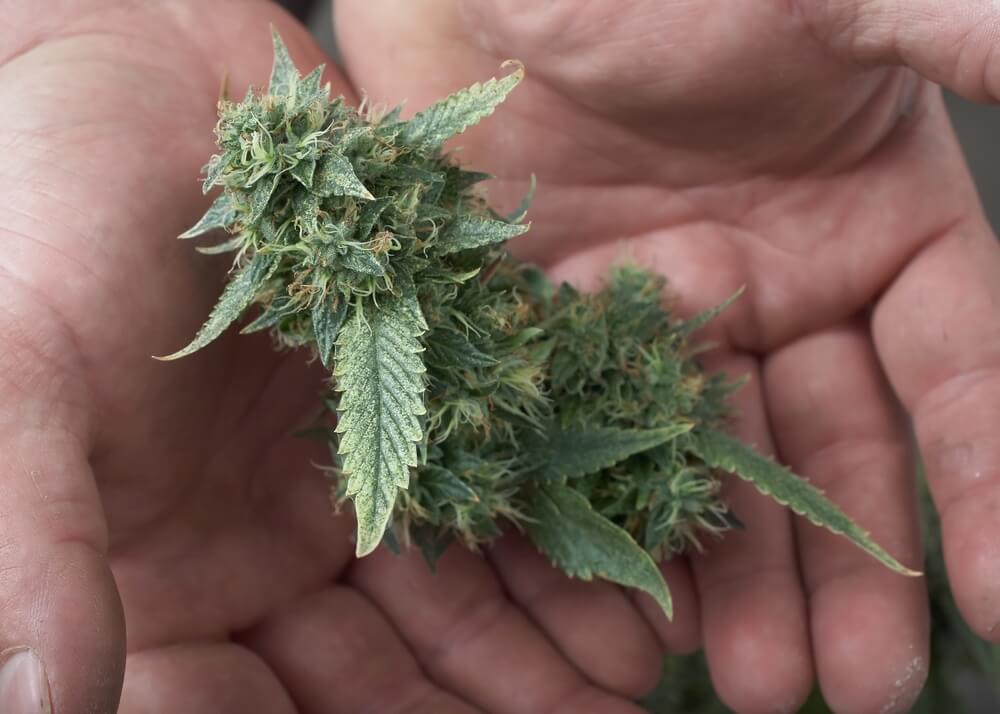
Harvest when the bud resin is sticky and clear with an amber or brown ting beginning to darken it.
For better control of the marijuana’s effects and flavor, follow these three steps:
- For a mellow high and light flavor, harvest when 50-75% of the pistils are a reddish brown.
- When pistils are 70-90% brown, you get a stronger and heavier tasting weed.
- Waiting until the pistils are over 90% brown, makes your weed too heavy with a narcotic effect.
Other signs of harvest time include broadening stems and leaves that are yellowing and dying back. If the trichomes (bud hairs) are clear, wait a little longer before harvesting. If the hairs are milky white and starting to turn an amber color, it’s time for harvesting. Don’t wait until the hairs turn completely amber or you get a strong weed with an unpleasant flavor.
As a rule, Indica matures after eight weeks of flowering, Sativa after twelve weeks, and auto-flower strains after ten weeks. It’s best to check the suggested flowering phase length for the strain you grow.
The Importance of Light and Growing Marijuana
 The key ingredient to growing large yields of marijuana is lots of light. If you don’t have the right amount of light, you cannot sustain a viable crop. No matter what medium or growing method you use, the most needed nutrient for marijuana health and growth is light.
The Role of Light for Growing Marijuana
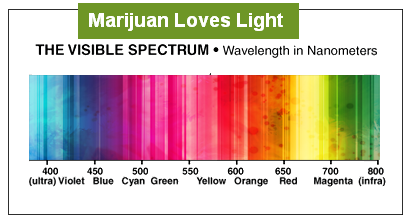
Before deciding on any lighting systems, your priority is deciding the temperature and color you need for your crops. Each light color impacts your weed growth stages.
Determine HID fluorescent color and color intensity by checking the CRI and CCT/Kelvin ratings. A high CRI means a vibrant natural color appearance. With a Kelvin, the lower rating is a white while; the higher rating gives a bluer color. With Kelvin lighting, 6500K mimics sunlight, 4200K is cool blue, and 2700K is warm red.
Most growers use a maximum 1000w when cultivating marijuana. There’s differing advice on light wattage, but most agree, over 1000W causes harm and lower wattages can work very well. However, you’ll find LED wattages on the market, much higher than 1000W. But with LEDs, they run far cooler than other grow lights.
The best way to compare wattages between LEDs and non-LED lights is by looking at the lumens ratings. Marijuana crops grow best with a minimum 3000 lumens per square foot and 7000 to 10,000 lumens for maximum production.
The broad color spectrum lamps outperform grow lamps with high lumen outputs. Your weed plants need bright light several hours each day. However, the red and blue light spectrums are what the plants use for photosynthesis.
An important consideration for choosing a color spectrum is the PAR spectrum put out by full spectrum LED grow lights. Since plants only use a 400-700nm wavelength range, it’s the PAR rating that matters.
Light Sources
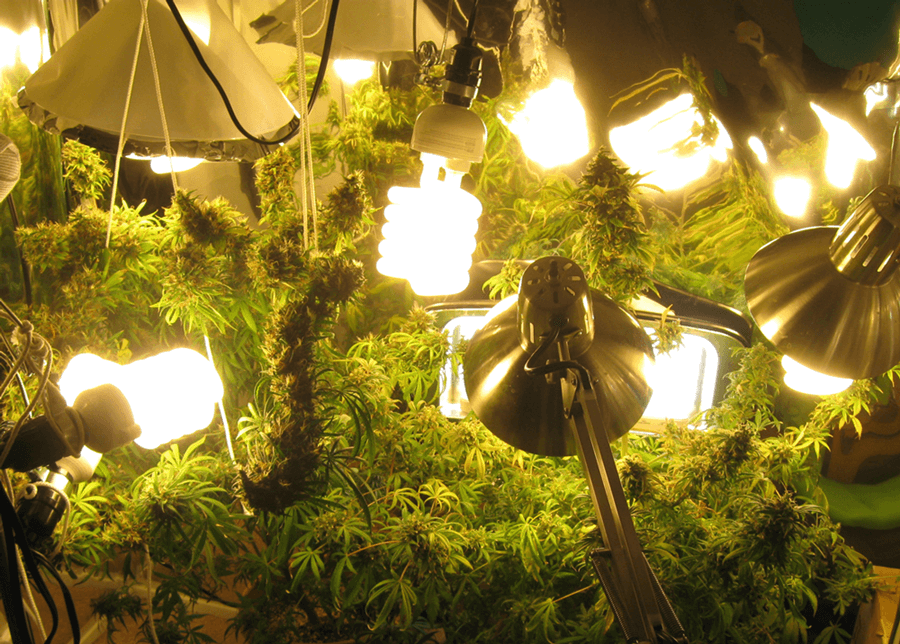 Growing marijuana indoors needs a source of artificial light. If you want great results, you must have good lighting. The best choices for providing your marijuana crop with artificial light are fluorescent or LED grow lights.
Fluorescent lights come in compact fluorescent or CFLs. Compact fluorescents are available worldwide, while specialty HID lights are harder to locate and are not available in many areas.
LED lighting systems are the easiest and best growing option for beginner weed growers. The biggest benefit of using LED grow lights is the full spectrum lighting they provide with low heat levels.
Grow Light Systems
There’s an overwhelming supply of lighting systems for growing marijuana inside, and each option has pros and cons. Grow light systems include, timers, bulbs, ballasts, reflectors, different color spectrums, and a host of other features.
Different bulbs emit a broad spectrum of light, usable for growing weed. You even have the option of different lights for the various growth stages. But, with all the choices, your simplest option is an LED grow light. With LEDs, your plants get every kind of light it needs more cheaply and efficiently, with easy-to-use controls.
Regardless of what system you choose, you want something for activating rapid growth while maximizing the marijuana yields.
Lighting Placement
The lighting system you use determines the distance you need between your plants and the lighting source. Grow lights that emit heat, for example, need a location higher above the marijuana plants than other lights. However, cooler heat emitting lights, like LED growing lights, can hang ten to fourteen inches above your plants.
Before hanging your grow lights, always refer to the manufacturer’s included instructions.
Marijuana Growth Stages and the Lighting Schedules for Each
During the different growing stages of your cannabis plants, you need a variety of lighting hours schedules.
- Seeding Phase – Sixteen to Eighteen hours of applicable strain lighting recommendations.
- Vegetative Phase – Eighteen to twenty-four hours of applicable strain lighting recommendations.
- Flowering Phase – Increased red spectrum and twelve hours of lighting.
It’s important to remember that lighting is key to your marijuana crop nourishment. Without the proper lighting, your harvest won’t be ideal, or you may lose some of your crops. Always research the lighting recommendation for the strain of marijuana you plan to grow.
Harvest Time
 After weeks of sprouting, transplanting, and going through all the growing stages of weed, it’s finally harvesting time. Harvesting isn’t difficult and is really kind of fun. Harvest is the time you get to reap the rewards of all your hard work.
When to Harvest Weed Plants
You can determine when to harvest your weed crop simply by looking for the bud hairs and checking the pistil color. At the start of the flowering stage, the pistils are white. But, as the pistils get to the harvest stage they turn dark brown.
Once 70% of the pistils turn brown, it’s time to get ready for harvesting. After entering the browning stage, harvest depends on the effects and taste you’re wanting. The darker you let your pistils turn, the more narcotic the weed is and the heavier it tastes.
How to Harvest Weed Plants
Harvesting isn’t hard, but it is a time-consuming job, especially if you have a large crop to harvest.
Begin the harvest by cutting the weed plant completely from the root. Starting with the heaviest and largest, cut all the nourished plants in the grow area.
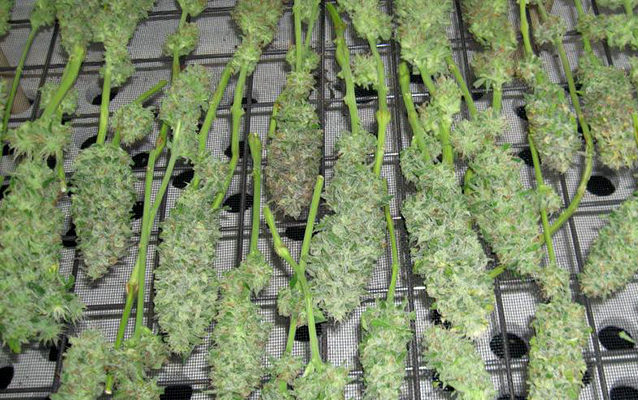
Once you have your plants cut, remove a few of the large fan leaves. String wire or heavy string horizontally from the ceiling. Hang the plants, upside down, from the wire. Make sure you allow enough space between each plant for giving plenty of air circulation around the hanging plants.
Leave your plants hanging until completely dry and ready to bag. Air drying is cheap and reliable.
Most commercial operations make use of curing machines. However, if you have the investment money, you can find some great automated drying cabinets to help with the process.
Another option for improving ventilation for faster drying is oscillating fans. If using fans, make sure they circulate the air around your plants. Avoid damaging your harvest by not letting the fans blow directly on your plants. If you see your plants moving, you need to reposition the fans for indirect drying air.
Importance of Time of Day
The time of day you harvest is as important as how you harvest. When growing weed indoors, harvesting is dependent on your lighting schedule. For example, if you have a lighting schedule set for nighttime, start harvesting early morning when the lights are off.
Since harvesting marijuana is so time-consuming, you should plan out the time you think it will take for cutting. Take stock of the number of plants you need to harvest and estimate the time needed for harvesting. You want to make sure you have enough time to get all the plants harvested in one secession. If you plan on big crops, you may need a friend to help come harvest time. You can also stagger your growing times, so you aren’t harvesting your plants all at once.
Preparing Weed for Smoking
 Beyond popular belief, marijuana plants don’t die when you cut them. The plants die once their water is completely dried out and gone.
Before continuing, keep your plants in an environment of 70° Fahrenheit with 50% humidity for 7-14 days. Maintaining this temperature and humidity range dries the last of the water from the plants. You also want to keep the room as dark as possible.
You don’t want mildew or mold developing so, occasionally check your plants for any signs on the pot leaves. If any parts of your plants show signs, immediately remove the affected areas. Using the fans to keep the air circulating around the plants is a great preventative measure.
Please note, that at the beginning of the drying cycle, your plants emit a strong and unmistakable marijuana scent. But, don’t let temptation get the better of you and start hurrying things along. If you want strong, flavorful, and aromatic buds, let your weed dry slowly for about one to two weeks.
Once you have your marijuana completely dry, it’s time to take the final processing step. You’re ready for the final curing stage for producing smokable weed that’s tasty and effective.
If your buds have brittle inside twigs and a dry to the touch, outside surface, you’re ready to begin. The marijuana plant buds should easily snap off without any stringy stems left behind. Larger stems should still bend when you snap off the bud.
An extra step that many growers like to take is trimming the buds before starting the curing process. You do this by using clean, sharp scissors or scalpel knife and removing the remaining leaves. However, don’t throw these leaves away. They contain trichomes and work great for making edibles.
What Curing is and Why It’s Necessary
 The curing process ensures naturally occurring processes happen, and guarantees top quality with high-level potency. Curing also delivers a smooth and flavorful smoking experience.
The curing process performs some great functions for your dried marijuana buds, including:
- Improves the bud’s smoothness and taste by breaking down the chlorophyll.
- Headaches and coughing are less likely due to the reduced harshness of the weed.
- Enhances the aroma and flavor mix of your chosen marijuana strain.
- Many marijuana growers report increased potency.
- Less negative side-effects like paranoia and anxiety when properly cured.
- Reduces the risk of bacterial and mold growth on the buds.
While you’re eager to sample the quality of your first crop, we advise patience. The final product you produce makes your waiting time worth it. About fifty percent of the weed quality comes from good curing practices.
Steps for Curing Weed
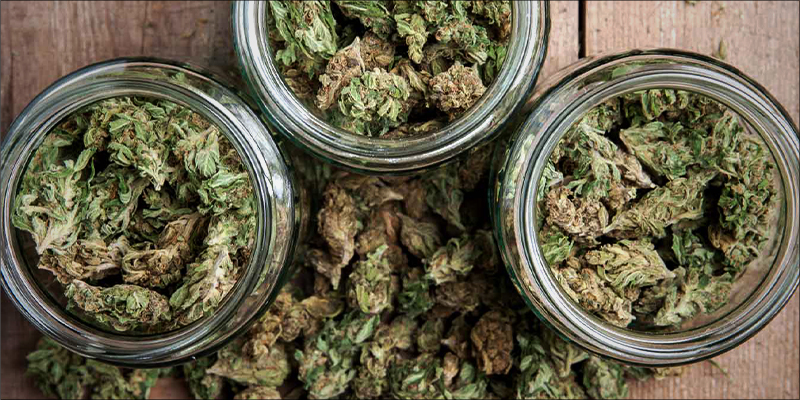
Curing is easy, just put the dried weed buds in quart-sized mason jars, filling three-quarters of the jar. A seventy-five percent full jar equals about one ounce of weed. If any of your buds aren’t dry to the touch, leave them to dry further.
Place a lid on the jar and give it a shake. If any buds stick together when shaking the jar, you still have too much moisture. Leave the lid off the jar until the buds are dry to the touch again. Put your jars in a cool and dark area, like a pantry or closet.
A good investment for the curing process is a hygrometer for testing the jars’ humidity. You’re trying for a relative humidity level of between sixty and sixty-five percent.
For the first two weeks, your buds need fresh air every 24-hours. Shake the jars, open the lids, and check for moisture once each day. If you feel moisture or smell ammonia, leave the lid off for 3-4 hours. If any buds feel wet, remove them completely and let dry for 24-hours.
While you want to avoid over-drying, it’s not a huge worry. Even with over-dried cannabis, you still get improved weed quality.
At two weeks, after the buds have a good cure going, drop adding the fresh air to once a week. If after a couple of weeks, you don’t see any moisture, go to airing your weed once a month.
Buds should cure three to six months. After the first three months, keep buds in airtight containers, like mason jars.
For storage over six months, shift to something more permanent. Either vacuum seal your buds or tightly pack in mason jars and freeze.
How Long is the Cure Process?
The beauty of curing is the grower gets to control the smoothness and strength of their pot. We suggest trying a little at different curing or storage stages to see which vintage you like best. There is no right or wrong to the curing time length.
Our Final Take on Growing Weed Indoors
When you’re new, learning how to grow weed seems like a confusing and daunting task. Hopefully, our how-to guide helped break down the overly technical instructions into easy to understand steps.
Many instructions we find, while not incorrect, are geared to those growers with more experience. Our guide gives you the basics for growing weed, with enough information to get you started on your first crop.
As you gain growing experience, you’ll find a lot of advanced information for developing new and more complicated techniques.

The team at LEDGrowLightsHQ.com is composed of expert cannabis writers and enthusiasts, many who frequent small grow operations for recreational purposes. We often provide insight from our partners or large publications or magazines.